

Model Hub user interface
Home page
The Hackolade Model Hub home page displays a dashboard. For the repositories configured as sources for the Hub, each tile represents a category of assets in the database with a counter.
Each tile is clickable so you can start browsing. There is also a Lineage button to display a graph of all your models in the repositories.
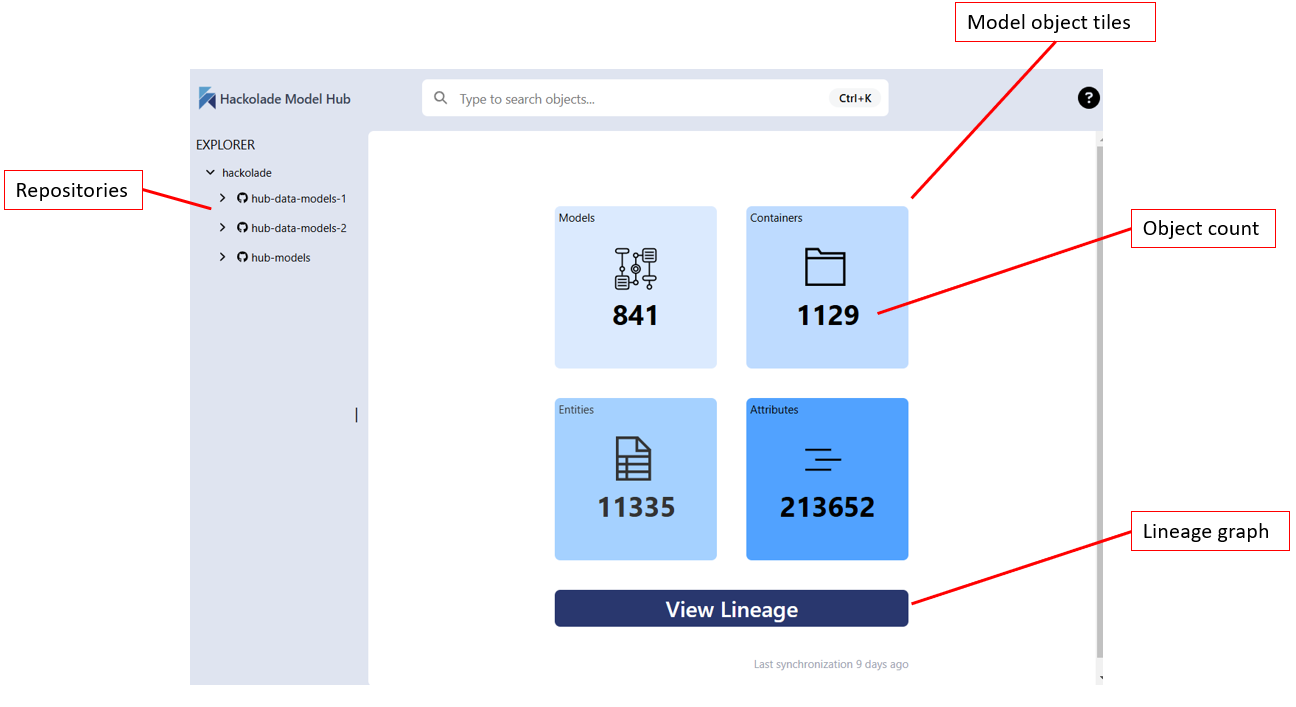
Additional dashboard items will be added over time.
Workspace
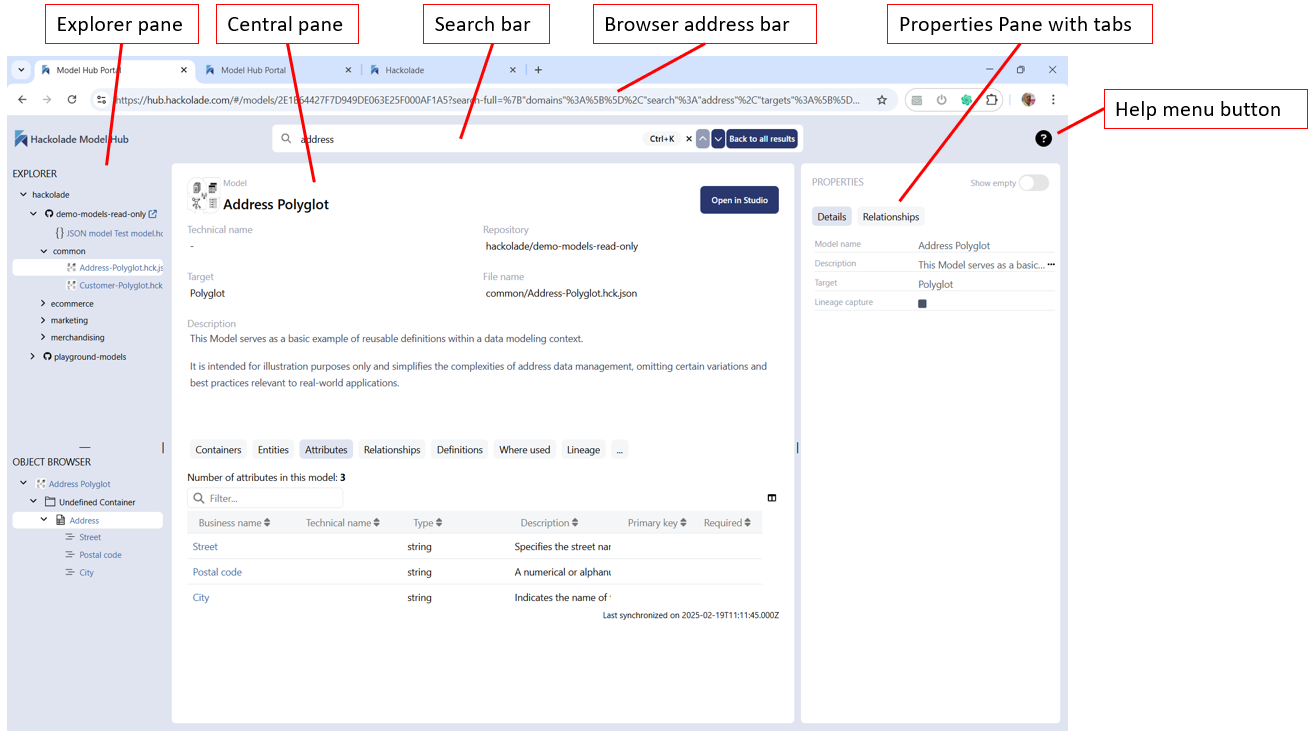
The Hackolade Enterprise Model Hub portal page is divided in multiple panes which may vary depending on where you are in the application.
You may select a model and its content by exploring the repositories displayed on the left, or you may perform a search by keyword.
Search bar
The Hub search bar is an interactive user interface element. It allows you to enter text and search for specific assets or model objects: containers, entities, attributes. When you select a search result, you will be able to consult their detailed properties, structure, lineage, etc.
You may access the search at any time by clicking inside the search bar, or by pressing Ctrl/Cmd+K.
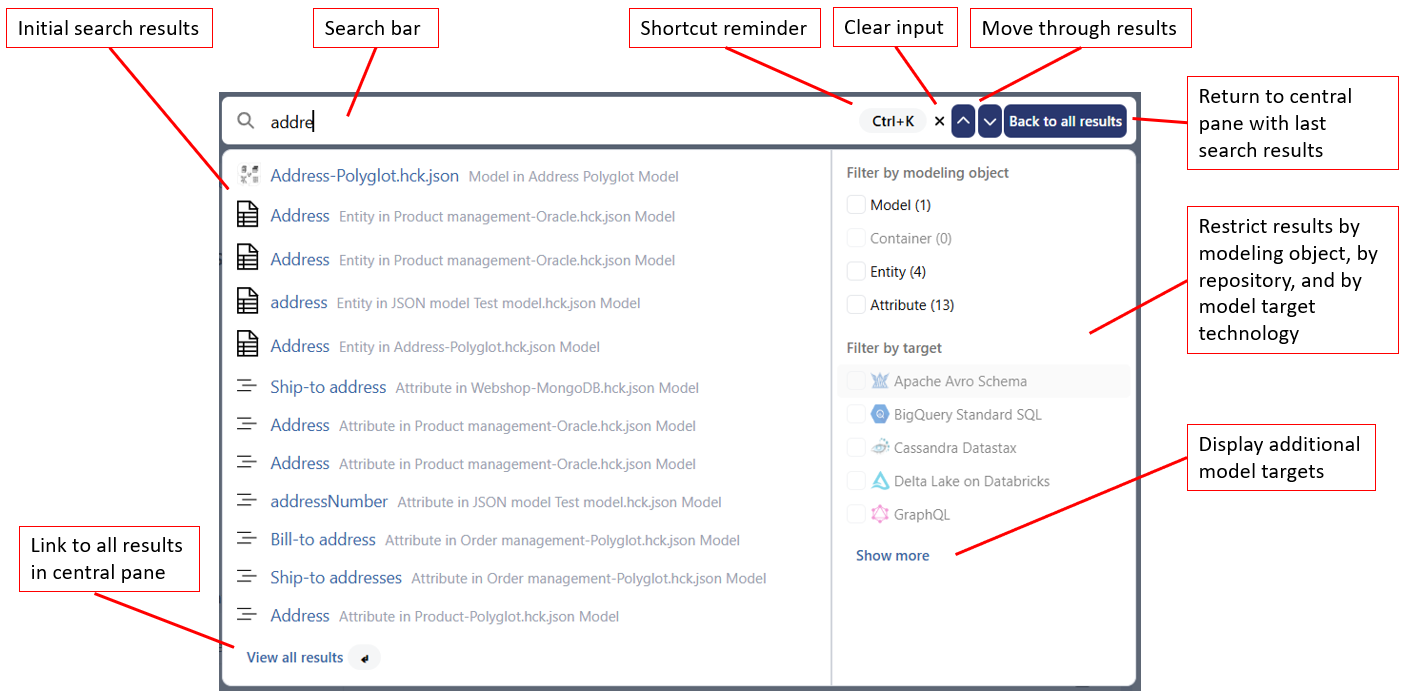
As you type, the search bar displays suggested results, helping to refine the search query or select a suitable result. A preview of the first results is displayed in a dropdown panel. You may see the details for one of the search results, or you may display the full list of results in the central pane by pressing Enter or by clicking the link "View all results".
If the list is too long, you may want to filter the search results by applying one or more filters on the right hand side of the dropdown panel. There are 3 families of filters: by repository, by model object, or by model target technology. By default, no filter is applied. If you check one or more boxes, the search results are narrowed to match the selected filter.
Once you select a search result and you view the details, you may want to navigate up or down through the results without having to change the screen you're on. At any time, you may go back to the results list of your last search.
To clear your search input, simply click the X in the search bar.
Note: for an exact search or an expression or phrase, make sure to surround it with double quotes.
Explorer pane
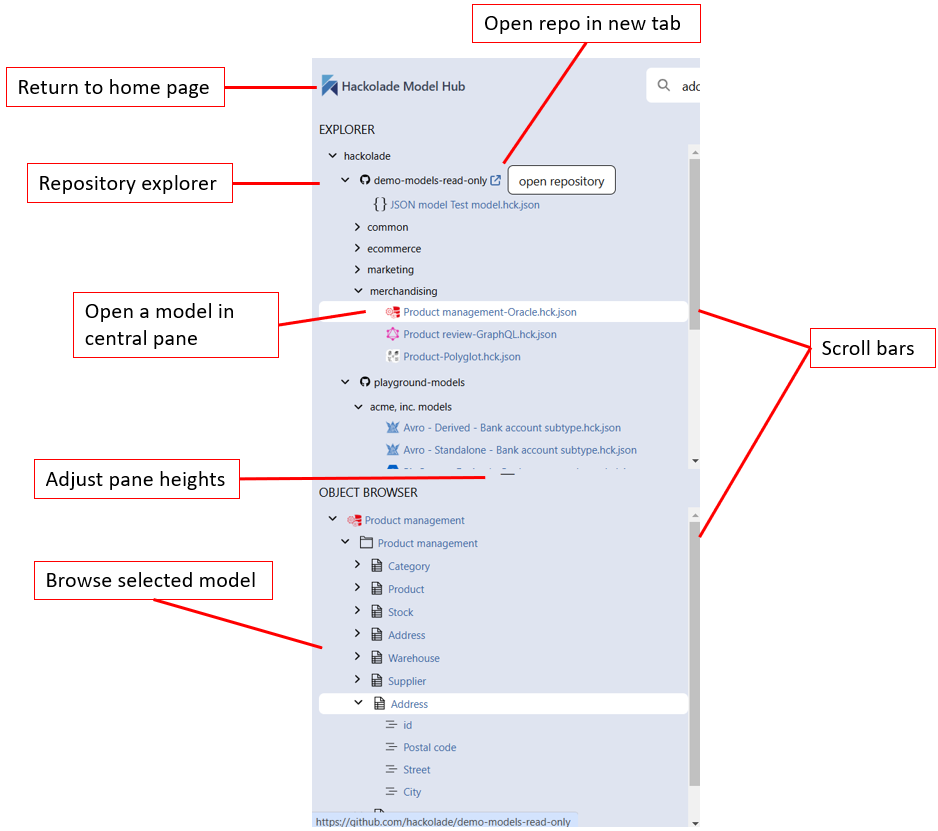
The explorer pane is on the left side of the workspace. You may adjust its width by dragging it left or right.
The explorer pane is divided into an upper part so you may explore the repository or repositories and their folders, and a lower part so you may explore the selected model. Each part is made of a hierarchical structure with expandable/collapsible nodes. Blue text is clickable and displays the relevant details in the central pane. There is a handle between the upper and lower parts of the pane so you may adjust their size.
Central pane
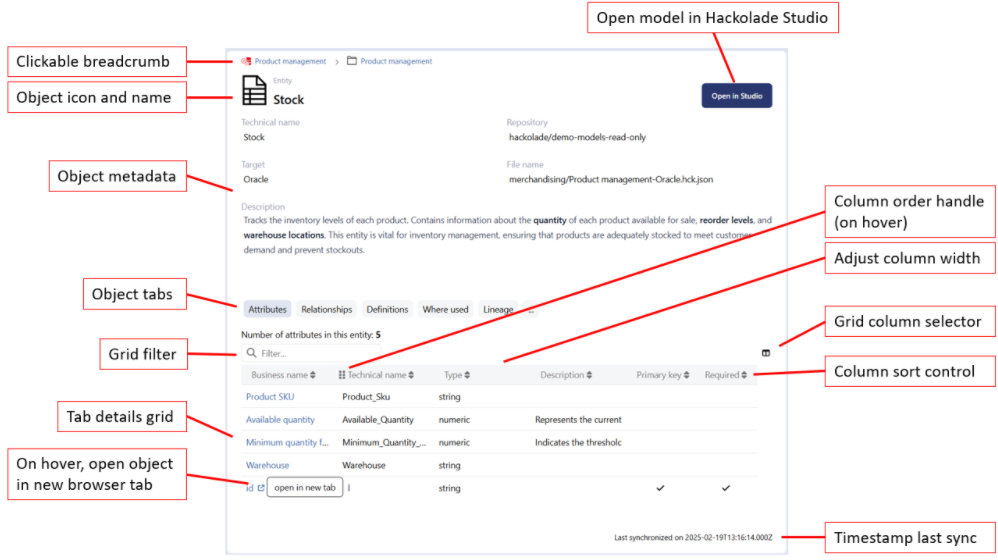
The central pane is where you can see detailed information for the selected object. There are tabs with a searchable and customizable grid so you can drill down further into the selected object.
A breadcrumb at the top allows to selectively go back up in the hierarchy. At any time, you may open the corresponding model in Hackolade Studio.
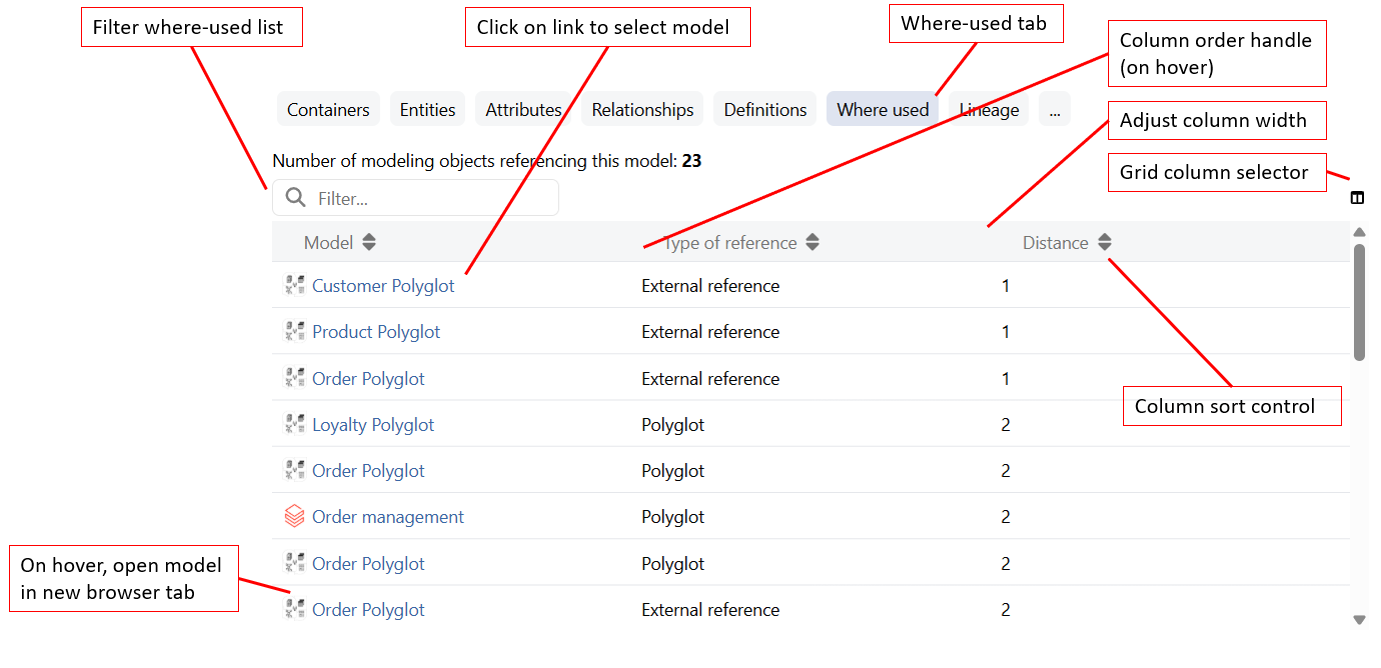
Where-Used tab
The where-used grid display s list of downstream models to allow a view on impact analysis.
Lineage tab
The lineage tab display a graph of the relationships between models, if any. While the where-used grid shows downstream models only, the lineage graph shows both upstream and downstream models, if any.
Models can be derived from a polyglot model, and/or have references to external definitions. Given the modular capabilities we advocate with domain-driven data modeling and the capability to refer to parts of multiple other models, it may be handy to see how models relate to each other. This information is useful to measure the impact of a change upstream on models downstream.
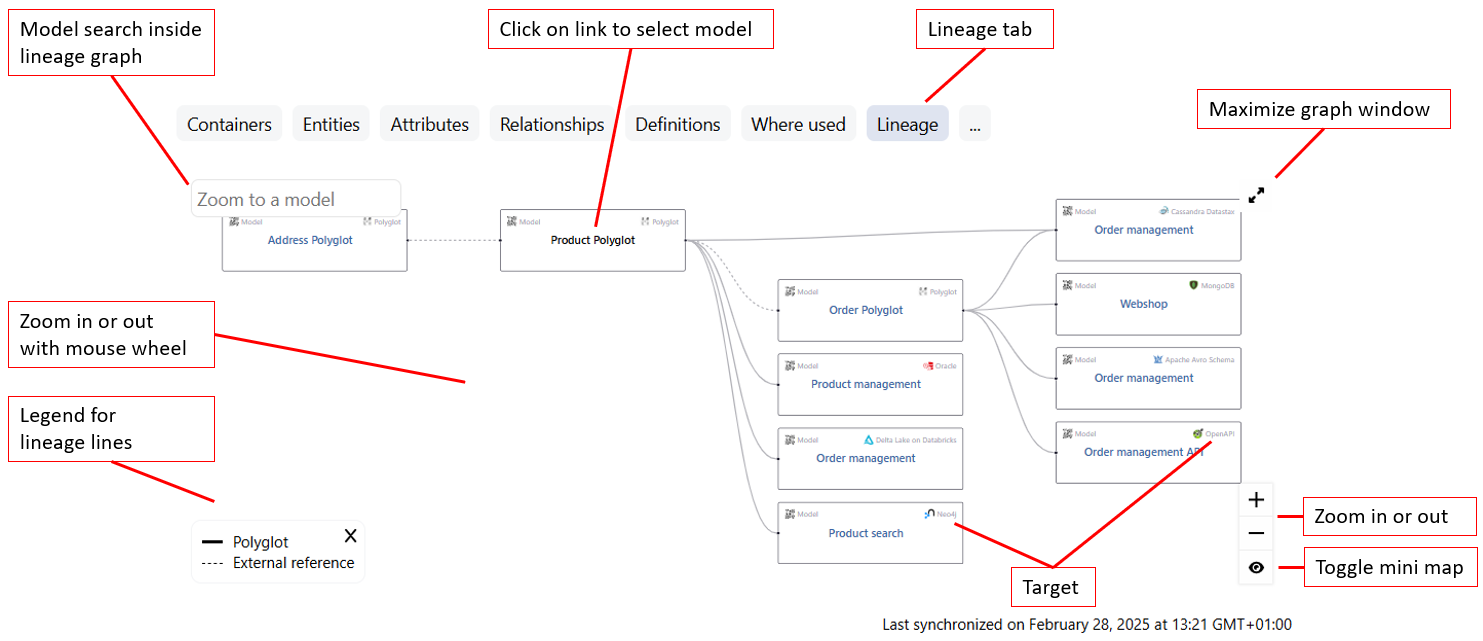
You may search the graph, zoom in or out, select any model in the graph, maximize the display, and toggle a mini map when the graph is particularly large.
Properties pane
The properties pane is on the right side of the workspace. You may adjust its width by dragging it left or right.
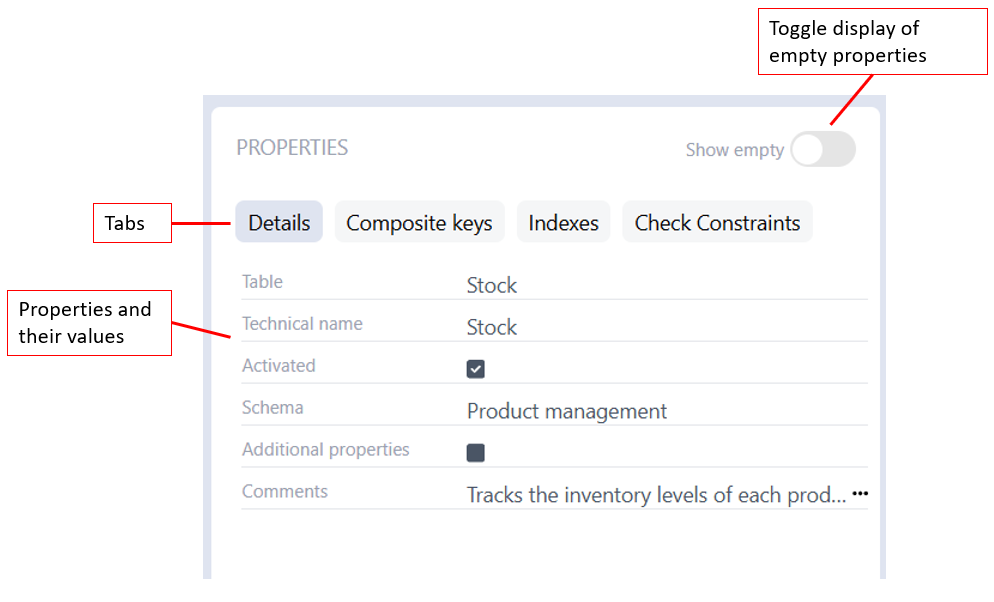
The properties pane is similar to the one you have in Hackolade Studio. It may display additional tabs, if applicable, and their corresponding properties.
You may toggle the display of empty properties.
Glossaries and business terms
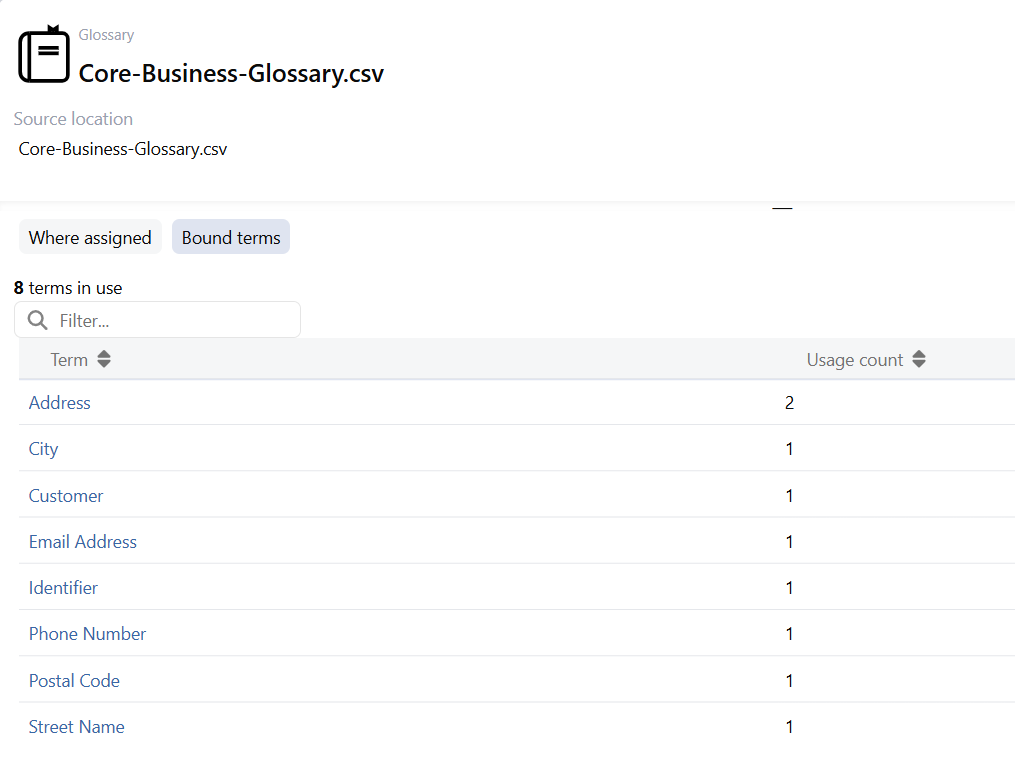
Glossaries and glossary terms are not first-class objects in data models. Rather models, entities, and attributes are associated (or bound) to one of more business terms from one or more glossaries. And this association gets stored in model files.
The Model Hub compiles glossaries and terms encountered across models in the database to the browsing, search, and where-used capabilities.
Important: the list of glossaries and the list of terms within a glossary may be incomplete if compared to their original source. This would be due to the fact that they have not been encountered in the data models in the Model Hub database. For example if a business term in a glossary is not bound to any model object in data models, then the term would simply not appear in Model Hub. Similarly, if a model has not been published to the default branch that is replicated to the Model Hub database. Additionally, for a glossary to appear here, it is necessary that at least one of its terms has been bound to at least one model object in a replicated data model.
For a glossary detail screen, there are currently 2 tabs, the first one listing all the models where the glossary was assigned, and the second one listing all the business terms occurrences found in Model Hub data models.
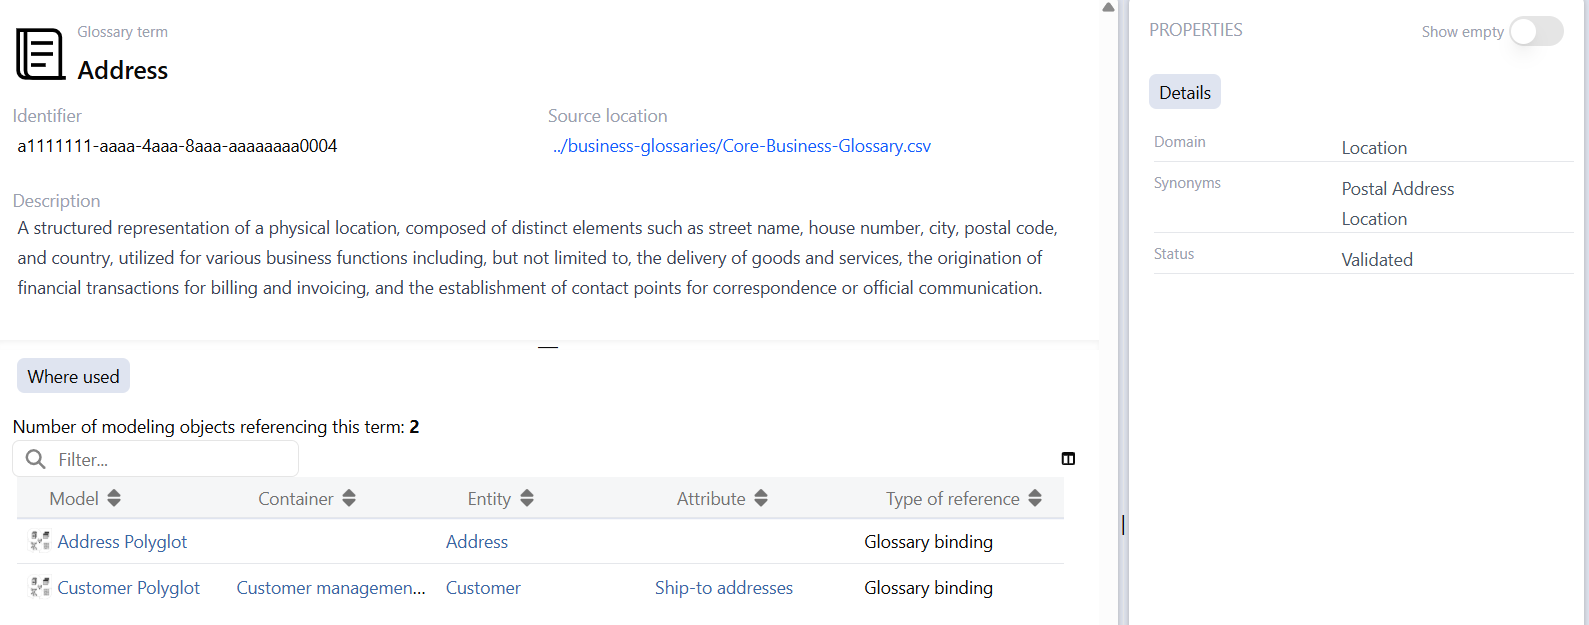
The details screen for glossary term includes the description and glossary location, plus a tab showing a grid of models and model objects where the term has been used:
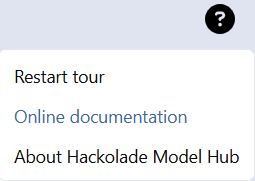
Menu
The menu button allows you, at any time to:
- access the Admin panel
- display the license status
- restart the application quick tour
- access this online documentation page
- display the About box, including a list of the open-source libraries used in the application
- access the instructions helping users connect AI asisstants to the Model Hub MCP server
Admin panel
The Admin panel is for administrators. It allows to set up and manage the backend license, user authentication, and source repo providers and repositories
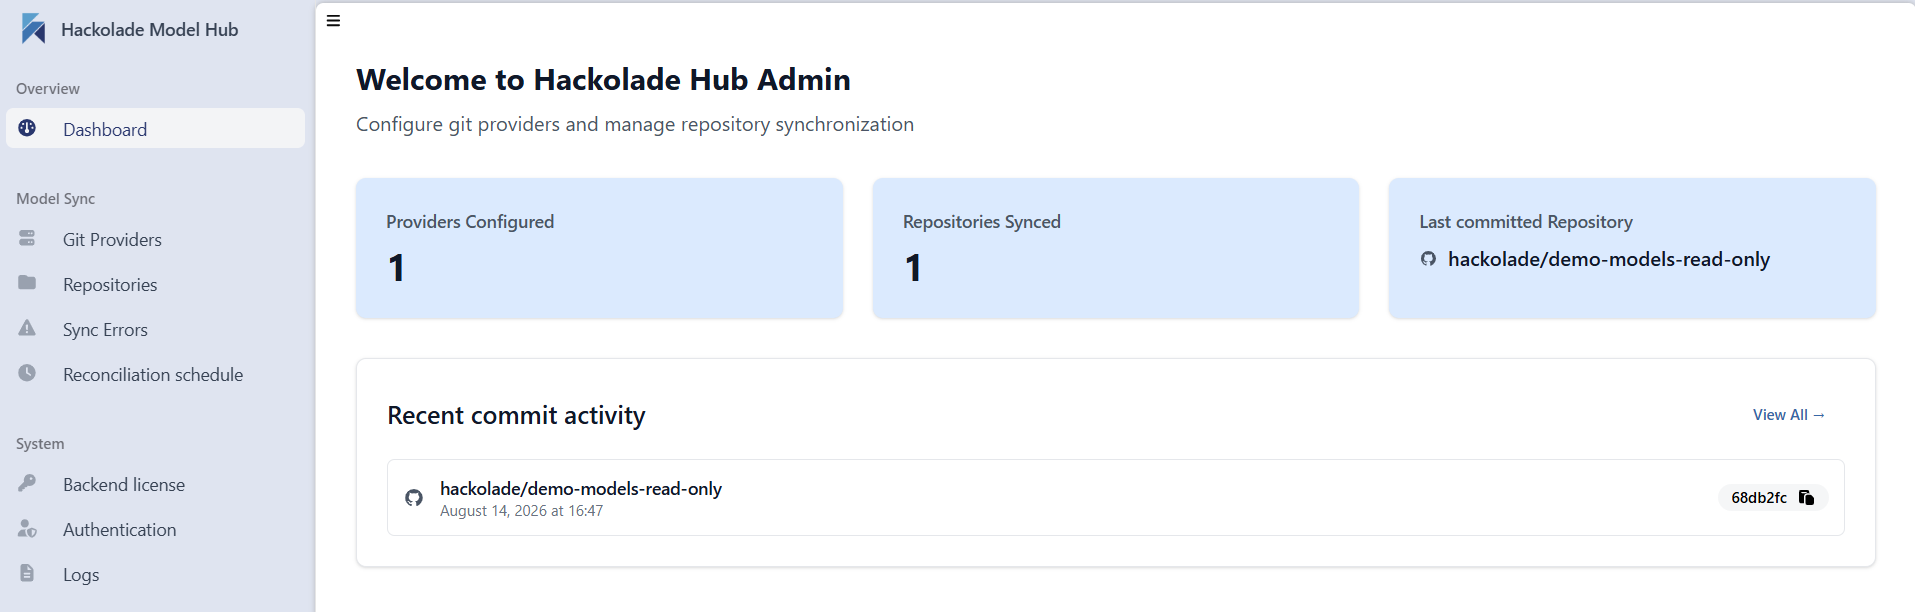
Refer to this page and sub-pages for more details on the configuration of repo providers and repositories.
Each instance of Model Hub requires its own license key.
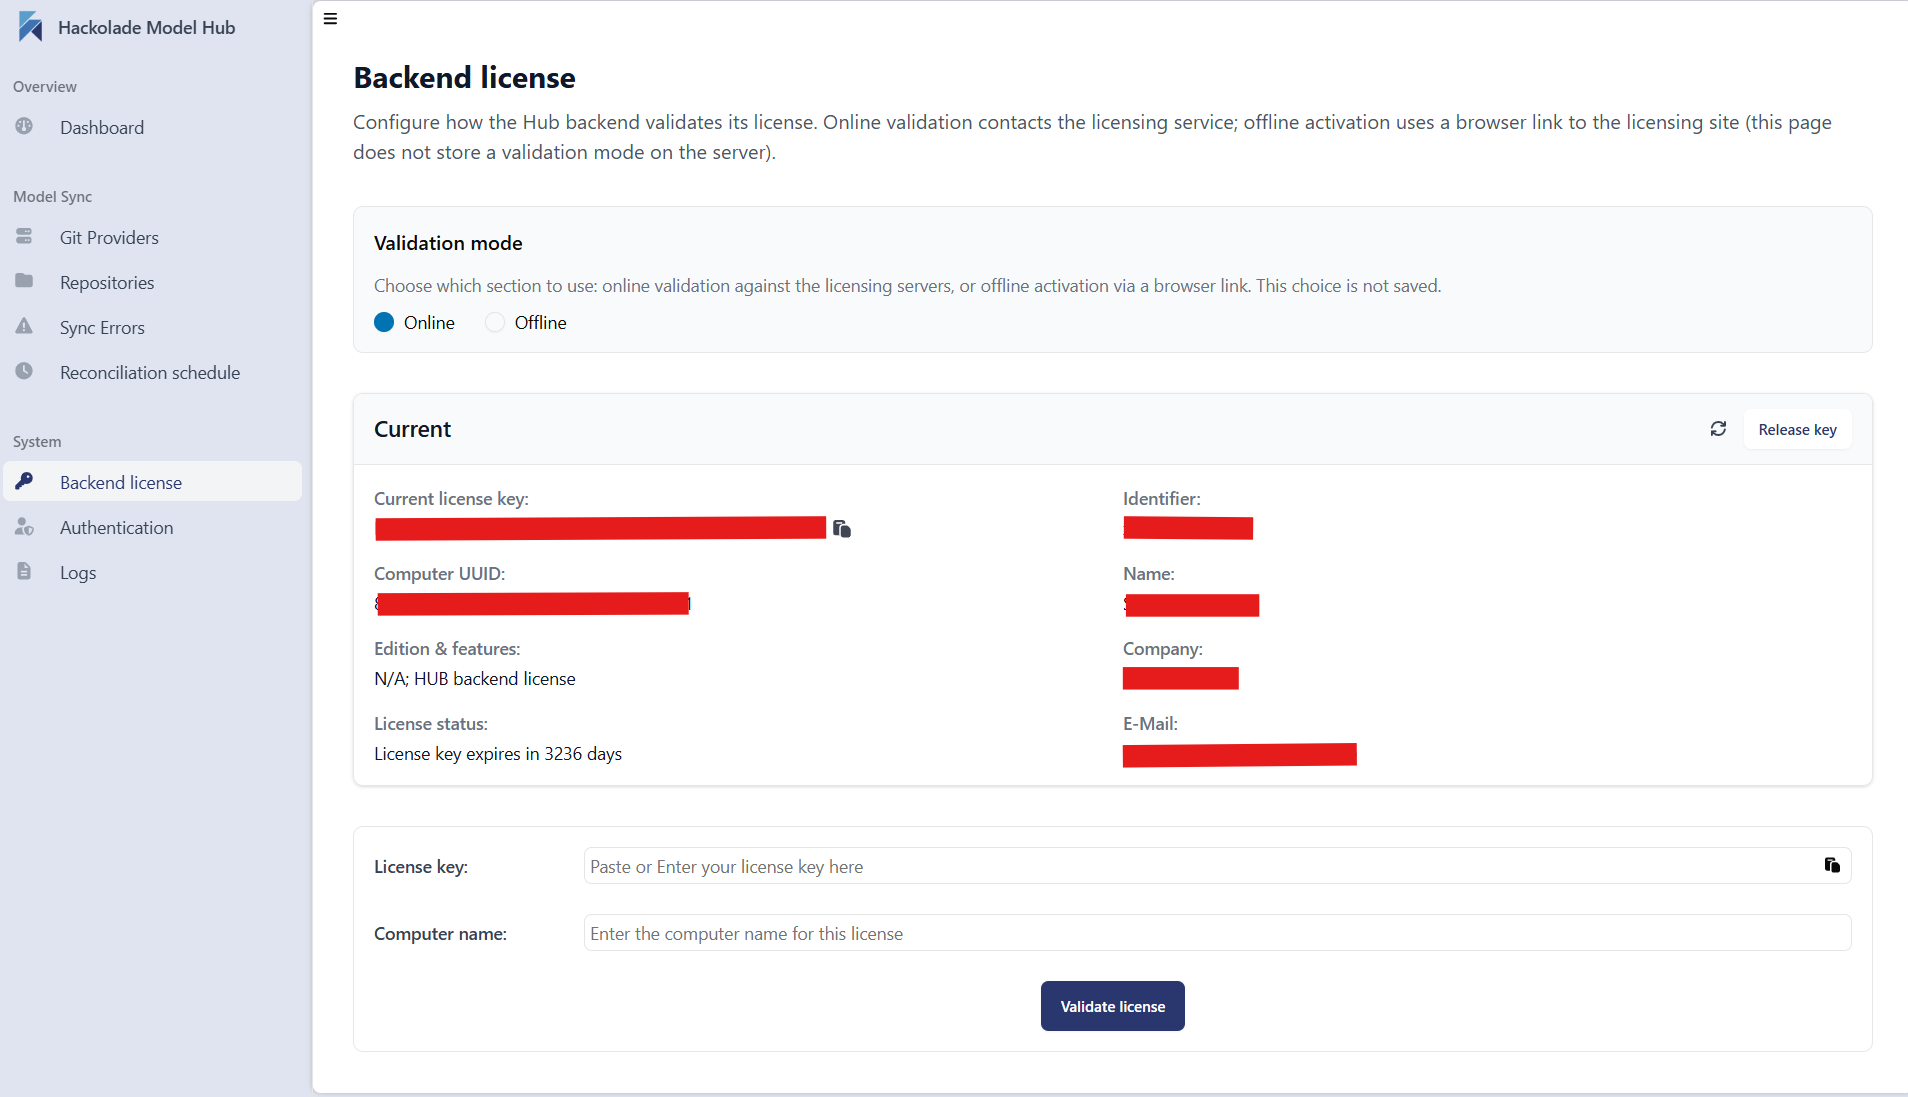
For more information on how to validate a license key, please read this page.
License status
End users also must have a proper license, either Workgroup or Viewer, configured to allow access to the Model Hub instance of your organization.
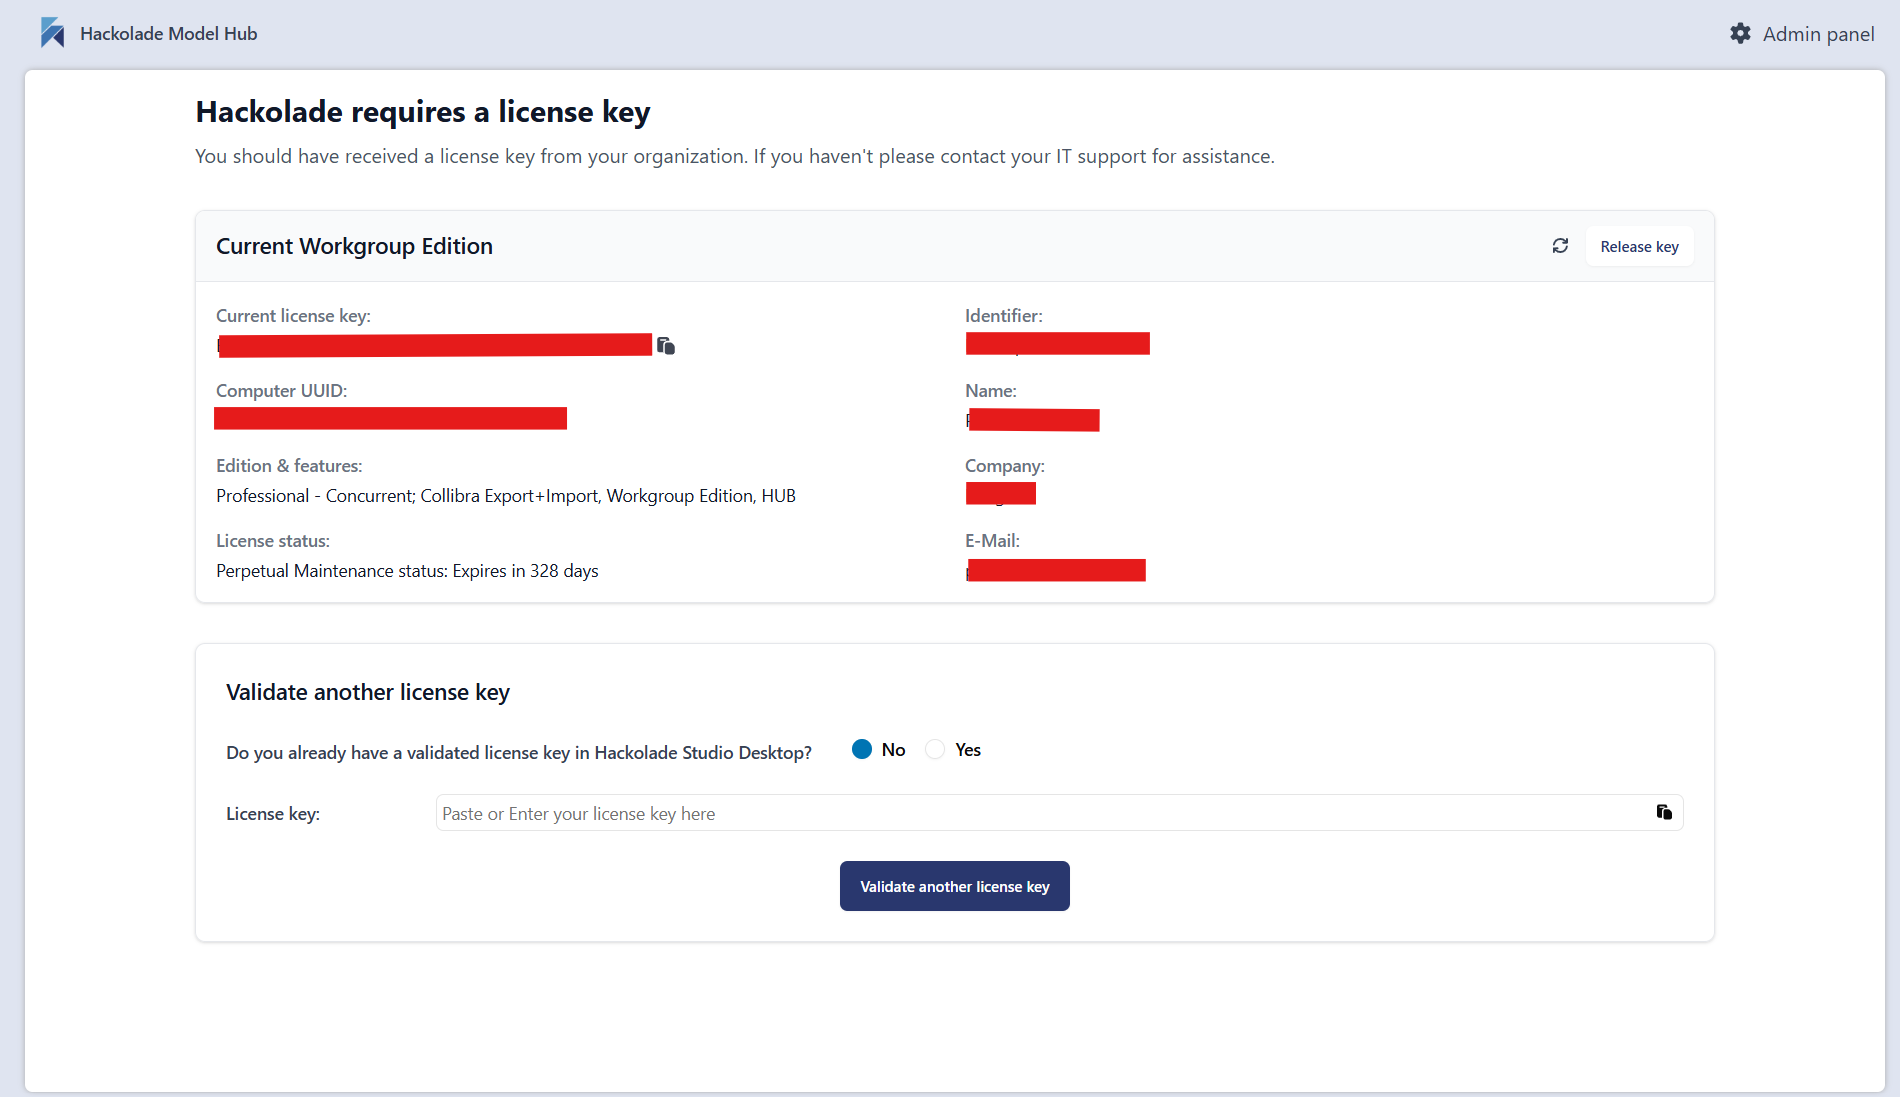
For more information on how to validate a license key, please read this page. If you already have a license key validated with Hackolade Studio desktop, make sure to read this section.
MCP server
The Moel Hub includes an MCP server. The details on how to connect from an AI assistant are described in this page.