Windows
Standard installation
The application is shipped as a signed .exe file with an installation wizard automatically placing the app in the proper folder and displaying the License Agreement and Release Notes. Windows installation does not require admin rights (unless the installation is made to a directory requiring admin rights) and does not write to the Windows Registry. However, in a corporate environment, you should contact your IT department. They can remotely access your computer and install the software for you. You should comply with the IT policy on non-approved software.
Note: It is impossible to validate the license key for, or operate the Hackolade Studio software if Windows Group Policies are set to prevent access to the Command Prompt. Please consult this article for additional information.
Warning: Do NOT install Hackolade in the AppData directory. You should select either Program Files, or C:\Hackolade or some other place where you have Write rights. AppData is for application data, not application programs.

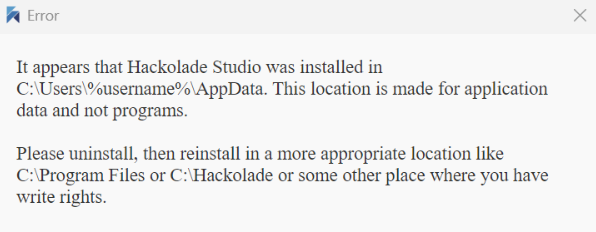
Important: do NOT install a new version of Hackolade while the application is running. All instances of the application must be closed for the upgrade to proceed properly. Please refer to this page if you get an error such as this one:

Windows Extended Validation (EV) Code Signing certificates enhance trust in security dialogs by prominently displaying the verified publisher's name. These certificates undergo rigorous publisher validation, ensuring the organization's identity is clear to users. Unlike standard certificates, EV Code Signing Certificates make the publisher information more visible during software execution or installation.
EV-signed executables trigger the standard User Account Control (UAC) prompt displayed below, showing Hackolade Studio's producer NV IntegrIT, as the verified publisher name, with enhanced indicators like the blue title bar. This distinguishes from unsigned or standard-signed apps, reducing perceived risk.
After downloading the application from our download page, double-click on the downloaded .exe file and the wizard will start. You will first see the publisher verification dialog letting you check the authenticity of the download signed with Hackolade's parent company NV IntegrIT's extended validation certificate.

The wizard starts with a Welcome page stating the version number about to be installed

You need to approve the License Agreement to proceed:

A default installation folder is proposed, which may be changed if you wish:

Warning: Do NOT install Hackolade in the AppData directory. You should select either Program Files as suggested, or C:\Hackolade or some other place where you have Write rights. AppData is for application data, not application programs.
After a couple of additional prompt, the installation process will start. At the end, you will be able to consult the release note, and automatically start the application.
Ensure that Hackolade Studio has the proper rights on your local drive
Hackolade Studio must be able to write on your local drive: to save data model files, to preserve parameters, to install plugins, etc. While you, as a user may have the rights to folders on your local drive, it is possible that some environments limit the rights of our application. It can be due to virtualization or sandboxing setup or most likely an anti-virus software. In particular, aggressive Windows Defender settings may prevent the application to operate properly, resulting in error messages like these:

EPERM: operation not permitted, rename...

EBUSY; resource busy or locked, open...

If your anti-virus is Windows Defender, you, or your IT department, can create an exclusion in Windows Defender. Follow these steps:
Open Windows Security:
- Press the Windows key + I to open Settings.
- Select "Privacy & Security."
- Click on "Windows Security" in the left sidebar.
Access Virus & Threat Protection Settings:
- In the Windows Security window, click on "Virus & threat protection."

Manage Settings:
- Under the "Virus & threat protection settings" section, click on "Manage settings."

Add or Remove Exclusions:
- Scroll down to the bottom, to the "Exclusions" section.
- Click on "Add or remove exclusions."

Add a Folder Exclusion:
- Click on "Add an exclusion."
- Choose "Folder" from the drop-down menu.
If you get the message that you don't have the permission to create this exclusion, you will need for your IT Security team to access your machine and allow this operation. Or ask them to perform it for you.

Specify the Folder Path:
- Navigate to the folder C:\Users\%username%\.hackolade and select it;
- also Navigate to the folder C:\Users\%username%\AppData\Roaming and select it.

Save Changes:
- Save your changes.
This exclusion tells Windows Defender not to scan or interfere with files and processes within the specified folder. Hackolade Studio should now have the necessary WRITE or EXECUTE permissions in the specified directory.
Remember to replace %username% in the folder path with the actual username. After making these changes, the application should be able to operate in the specified directory without being blocked by Windows Defender.
Silent installation
Important license note: by installing, you accept the license agreement for the application, even if the silent installation does not prompt you.
The installation program also supports silent mode for command-line installations, with the following arguments:
| /SILENT | Runs the installer in silent mode (The progress window is displayed) |
|---|---|
| /VERYSILENT | Very silent mode. No windows are displayed. |
| /SUPPRESSMSGBOXES | Suppress message boxes. Only has an effect when combined with '/SILENT' and '/VERYSILENT'. |
| /NOCANCEL | Disables canceling the installation process. |
| /DIR="x:\dirname" | Overrides the default install directory. |
Example:
Silently install the program, suppress message boxes, and install in a user directory instead of the default.
Hackolade-win64-setup-signed.exe /VERYSILENT /SUPPRESSMSGBOXES /DIR="C:/Users/%username%/Hackolade"
Corporate deployments - how to prevent checks for application updates?
See more details in this page.
Chocolatey
Chocolatey is a package installer for Windows. You may read this excellent overview of Chocolatey if you're not already familiar with it. Chocolatey must be installed and runs exclusively in Powershell.
An official Hackolade Studio package has been submitted for review, which is available here.
When first installing Hackolade Studio, run this Powershell command:
choco install hackolade-studio --version=<version>
where <version> should be replaced with the version number (without the v prefix) of your choice, typically the latest, as visible on our download page.
Later, to upgrade to the latest version, as we release every week, run this command:
choco upgrade hackolade-studio
Important license note: by installing or upgrading, you accept the license agreement for the application, even if the silent installation does not prompt you.
Important note: you cannot install or upgrade if the application is opened at the same. Make sure to exit all Hackolade Studio instances prior to running the choco commands if you want to avoid this type of error message:
WARNING: User (you) canceled the installation.
ERROR: Running ["C:\Users\%username%\AppData\Local\Temp\chocolatey\hackolade-studio\<version>\Hackolade-win64-setup-signed.exe" /VERYSILENT /SUPPRESSMSGBOXES /NORESTART /SP- ] was not successful. Exit code was '5'. Exit code indicates the following: User (you) canceled the installation..
The install of hackolade-studio was NOT successful.
Error while running 'C:\ProgramData\chocolatey\lib\hackolade-studio\tools\chocolateyinstall.ps1'.
See log for details.
Chocolatey installed 0/1 packages. 1 packages failed.
See the log for details (C:\ProgramData\chocolatey\logs\chocolatey.log).
Licenses on Virtual Machines (or physical computer accessed via Remote Desktop Installations [RDP] or equivalent)
As long as you validate and use Hackolade Studio with the same combination of host machine, remote machine, and login, there should be no issue. If any of these 3 parameters is different, access is blocked. In a VM environment, it is critical that the VM instance is persistent to ensure the stability of the 3-parameter combination.
Important note: installing Hackolade on a central computer (whether on a PC or a server, whether the machine is virtual or physical, and whether on premises or in the Cloud) does not change the terms of our License Agreement. Specifically, that license metric is per "per seat", and that a license must be obtained for each device on or from which the Product is used or accessed. When the Product is accessed remotely across using Terminal Server, Remote Desktop, Windows App, virtual machine, Citrix, or an equivalent method, a separate Product license is required to be assigned to each device from which the application is accessed, i.e. not the virtual machine on which the Product is installed.
Important: before you delete a user login on a VM, or delete an entire VM, make sure to release the Hackolade key(s) via Help > Software Key Validation > Release. This is the only way for you to free up the seats of that user, and make it available for another one.
Reminder: when installing Hackolade on a VM to share among multiple users, it is important to realize that licensing is not attached to just the machine, but to the combination of the machine where Hackolade is installed, a client workstation identification for the PC accessing the application, and the user login. As per the EULA: "A license must be obtained for each device on or from which the Product is used or accessed."
Example: having 4 Hackolade users on a single VM is the equivalent of having 4 individual PCs running Hackolade from a licensing point of view: you need 4 license seats to be validated.
VM configuration
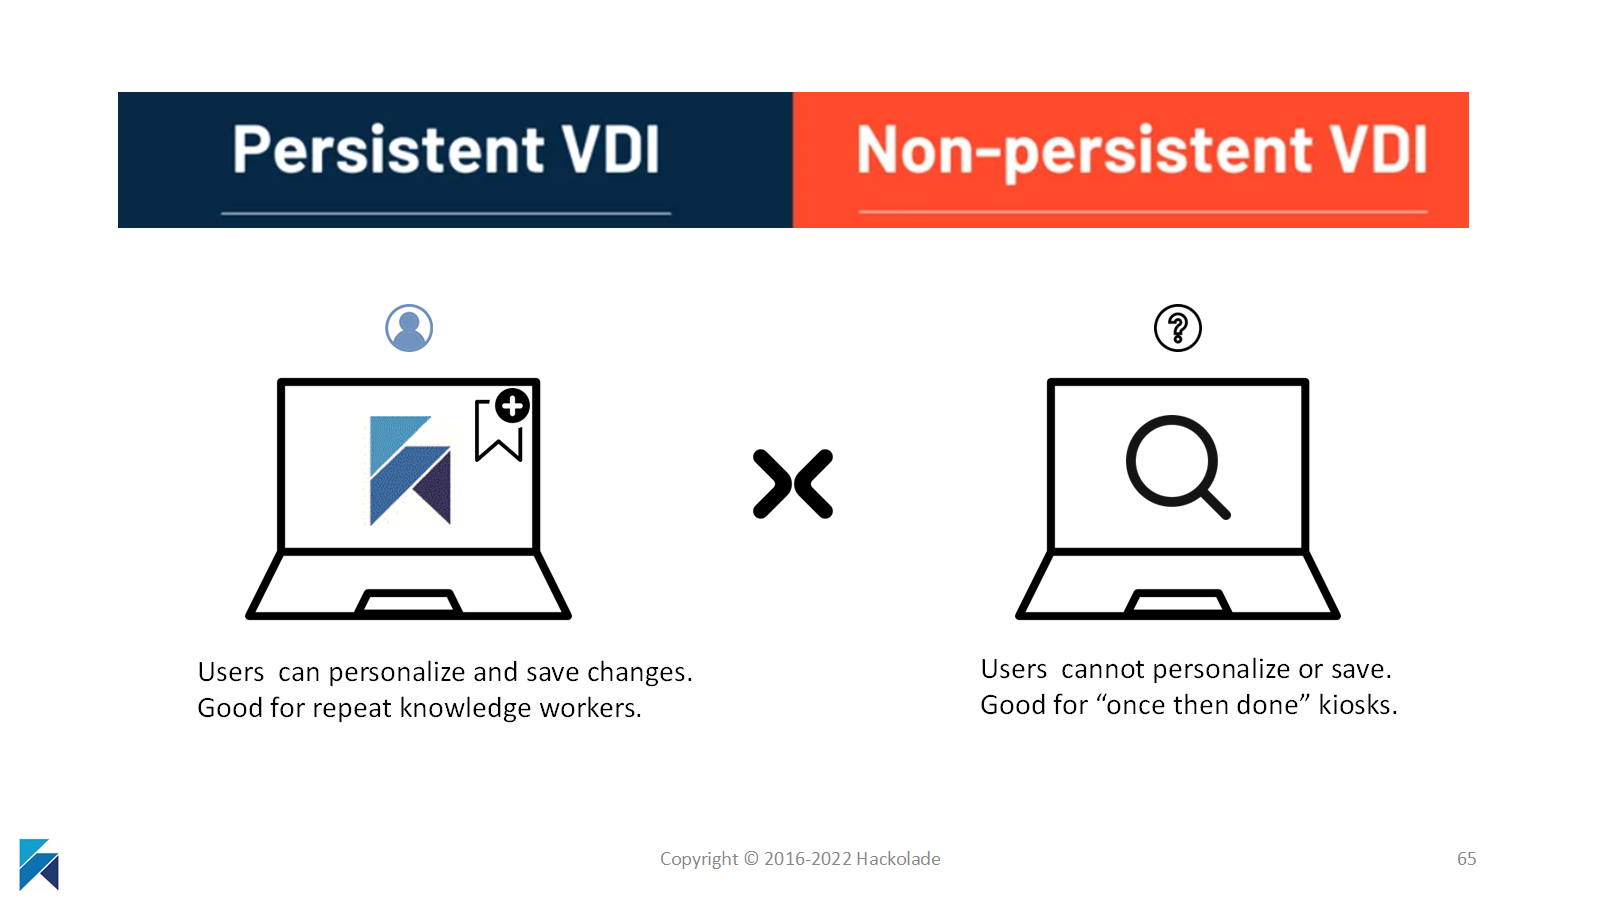
Note: it is critical that the VM setup is such that you access a persistent VM instance of the application. Non-persistent instances will cause license issues. See this article for a good discussion of persistent vs non-persistent (or stateless) VDI.

Hackolade licensing is enforced through registration on our license server of a combination of unique identifiers, including the UUID of the computer where Hackolade is installed, a client workstation identification for the PC accessing the application, and the user login. Each unknown combination reserves one seat on our license server, until you reach the total number of seats purchased for the submitted license key.
While typically Windows installation does not require admin rights, if the directory where the software is to be installed requires admin rights, you may need the intervention of an administrator with elevated rights to execute the installation. The Hackolade installation should be made for "all users" of the central computer, if given the choice. Please refer to the section above for instructions on the installation process.
Once the software is installed centrally, each user login should be able to access its own instance of the application. Each user login on the central computer will be required to go through software key validation, following the steps outlined here.
Given the way license seats are counted, it is important that identifiers remain stable. If your IT department configured VM infrastructure differently, it may be required for your IT department to adjust parameters in order to achieve stability.
Citrix
ENABLE_DYNAMIC_CLIENT_NAME should be left to YES
Allows client name to be the same as the computer name. When you change the computer name, the client name changes too.
• Yes (default) – Allows the client name to be the same as the computer name. Example, CitrixWorkspaceApp.exe ENABLE_DYNAMIC_CLIENT_NAME=Yes.
• No - Does not allow the client name to be the same as the computer name. You must specify a value for the CLIENT_NAME property. Example, CitrixWorkspaceApp.exe ENABLE_DYNAMIC_CLIENT_NAME=No
Additional resources:
https://docs.citrix.com/en-us/receiver/windows/4-9/install/cfg-command-line.html#dynamic-client-name
VMWare
As per this VMWare article, setup should generally be OK: "Each virtual machine has a universal unique identifier (UUID). The UUID is generated when you initially power on the virtual machine... Suspending and resuming a virtual machine does not trigger the process that generates a UUID... If you do not move or copy the virtual machine to another location, the UUID remains constant."
If it is not the case, maybe instructions in this article will help your IT department configure appropriately