
Tips and tricks
The following tips and tricks may be useful to quickly become a Hackolade power user!
Where does the name Hackolade come from?
;-) Hackolade is derived from a pun in French. We're quite focused on JSON, to say the least, and in French a {curly bracket} is called an "accolade". It is a "double entendre" as it also has the primary meaning "acknowledgment of merit". So we thought it was creative to play with the words and have a distinctive trademark brand for which the .com domain was available. This name is obviously tongue-in-cheek. Just like a hackathon has a positive connotation and does not imply breaching security or privacy, Hackolade conveys a positive message of innovative and clever data quality.
What is the End-of-Life (EOL) policy for Hackolade Studio?
Hackolade continues to provide support for version X for one calendar year after the release date of major version X+1, provided that you are current with maintenance fees for your perpetual license key, or with your subscription.
Release the license key from one computer to move to another
If you need to move your license key to another computer, you first need to release it on the PC where your key is currently validated. The procedure is also detailed in this page.
To do so, go to the option Help > License Status, and click the button "Release key"':

and click the Send button. This will free up the key on our license server.

Make sure to copy the license key and store it (or find your original license key confirmation email) as you will need it to activate on the other computer where you will want to use Hackolade.
As of this moment, you can no longer use Hackolade on the original computer, unless you you re-register it.
Go to the other computer where you want to use Hackolade and validate your license key using the instructions above '2. Validate your license key'
TIP: if your company has many licenses, your administrator may require that you enter your name in the Identifier (optional) field. You will find more details in this page.
TIP: if you're a license administrator, you may want to track who's using your licenses. You may do so by accessing the URL https://quicklicensemanager.com/hackolade/QlmCustomerSite/qlmlicenseinfo.aspx

To have identification information appear in the Computer Name column, users need to go to Help > Software Key Validation, then release their key, copy it to their clipboard, then fill in the identifier (name or whatever other standard you decide), paste the key, and validate again.

The identifier entered in the this screen will appear in the web page:

Workspace
TIP: If your target selection dialog has many icons, there is an incremental keyboard search to speed up selection. As soon as the dialog is open, simply start typing the name of the target. Studio will automatically highlight the first tile matching the typed text.
The search works as follows:
- It matches from the beginning of the target name (e.g., typing "pos" highlights PostgreSQL).
- If no match is found at the beginning, Studio searches within the name (e.g., typing "gre" highlights Cosmos DB Gremlin API).
- After a short pause, the search resets, allowing you to type a new query.
- Once a tile is highlighted, you can use the arrow keys to navigate between matching targets.
This feature allows quick keyboard-based navigation without manually scanning the entire list.
TIP: you may create extra space on your desktop by sliding the Object Browser or Properties panes with this control  appearing between the panes. You may also toggle the appearance of these panes in the View menu, or by double-clicking on the separation control.
TIP: to go back to the Welcome Page, simply choose View > Welcome Page. You may close the page, with the Close button on the lower right.
TIP: in any of the Comments dialogs, you may press the timestamp button to log data and time for your entries.
TIP: you may start multiple instances of Hackolade Studio on the same machine session, so as to work on multiple models simultaneously. You may also merge 2 Hackolade models, or combine elements from another model with copy/paste from one model in one application instance, to the other model in the second application instance. From within the application, this is easily done with the shortcut Ctrl+Shift+I (on Mac Cmd+Shift+I) or with the menu option File > Start New Application Instance
Or from the operating system, on Windows, right-click on the Hackolade icon in the toolbar then choose Hackolade:

On Mac/Linux, this is done with the command: open -n /Applications/Hackolade.app/
Running multiple instances on the same PC does not require additional license seats.
TIP: using the mouse wheel in both the ER Diagram and the hierarchical schema view:
-- up/down: move up or down
-- shift+up/down: move left or right
-- ctrl+up/down: zoom in or zoom out
Object Browser
TIP: it is very convenient to use the search for any string of text to locate one or multiple objects in the model

TIP: from the Object Browser, simply click on an attribute, and the central pane will switch to its location in the hierarchical schema view, with all the details in the Properties Pane.
TIP: you may add attributes from the Object Browser with a right-click to display a contextual submenu.
ERD
TIP: you may automatically resize an entity shape in the Entity Relationship Diagram view by clicking the double-sided arrow icon  at the top right corner of the shape

TIP: you may change the color of a shape title and frame by choosing from a palette that you can access by clicking the eye-dropper icon  just to the left of the auto-resize icon.
TIP: if you want to get the maximum level of zoom possible while showing all shapes in your diagram, simply click on the double-sided arrow icon  in the application toolbar.
TIP: after you've created shapes and relationships in the ER diagram, you may want to let Hackolade perform a basic distribution of the shapes according to an orthogonal formula, by choosing this grid-like icon  in the toolbar..
TIP: to select multiple shapes, keep the Ctrl/Cmd key pressed. Then you can move, align, distribute, etc...
TIP: when you select 2 or more shapes, these shape alignment toolbar icons become active: 
You may also do a right-click and access the same functions through the contextual menu.
TIP: when you select 3 or more shapes in line, you may distribute them evenly with these toolbar control icons:
TIP: you may change the order of the fields/attributes within an entity with these control icons: 
TIP: you may also change the order of the fields/attributes using the handle on the left of each attribute:

Furthermore, you may move an attribute to another entity, provided that there are no conflicts. It is not possible to move attributes across different views. By pressing the Ctrl/Cmd key+select the handle with the mouse, it is possible to perform a copy operation.
Note that, if the handle does not show, you may enable its display through the Display Options icon in the toolbar or via Tools > Options > Display
TIP: create a relationship with drag-and-drop: simply grab a field from one collection with your mouse, and drop it on a type-compatible field in another collection (type-compatible fields in other collections are highlighted as long as the mouse button is pressed.) Be careful that the application considers the source as the child in the foreign key relationship, and the destination is the parent. After the relationship is created, you may change the relationship type (foreign key or foreign master) and the cardinality in the Properties Pane.
TIP: with denormalization, an ERD can quickly become very busy with all the foreign master lines displayed. You may toggle these lines on or off with this toolbar button 
TIP: All of the controls to view properties for and manipulate attributes are also available now from the ERD view and the Object Browser, without having to necessarily open the entity in a new separate tab.
Hierarchical hierarchical schema view of entities (collections/tables/nodes & edges)
TIP: you may change the order of the fields/attributes with these control icons:
TIP: you may toggle more or less details in the view with this toolbar control: 
TIP: you may copy attributes by using the copy/paste function. Of course you can only paste attributes to complex types (sub-documents/maps or arrays/lists.)
TIP: when you enter data in the Sample field of the Properties Pane, Hackolade dynamically generates a sample JSON Data document in the JSON Preview lower tab.
JSON Preview
TIP: there are 3 types of validations being performed in this double-pane view: JSON Schema errors, JSON Data errors, sample document errors. You may click on each title's button to view the individual errors, or ALL to see a consolidate view.
TIP: changes being performed directly in this view can only be saved if they are properly validated. A button is provided to that effect.
TIP: DynamoDB only: the sample document in JSON data is displayed by default as plain JSON. It can also be displayed as 'DynamoDB JSON'.
Reverse-Engineering
TIP: if you encounter issues during the Reverse-Engineering process, there is a log file HackoladeRE.log located on your drive at C:\Users\%userprofile%\AppData\Roaming\HackoladeLogs (Windows), or /home/$[user]/Documents/HackoladeLogs (Linux), or Documents\HackoladeLogs (Mac). If you send this file to support@hackolade.com, we'll be have more information to investigate.
TIP: in MongoDB reverse-engineering, if you have instances with a very large number of databases, you may wish to declare a particular database directly in the connection string by appending the address with: /<name of the database you wish to access directly>, for example: localhost/NBA. Or you may declare the database name in the Advanced tab.
TIP: if you get an error "not master and slaveOk=false" when connecting to a MongoDB instance, on a secondary member (for example, a replica set connection using a read preference of secondary or secondaryPreferred), you first need to run rs.slaveOk() to be able to freely run Hackolade's reverse-engineering. This is because, by default, MongoDB does not permit read operations from non-master (i.e., slave or secondary) instances.
In MongoDB, reads to a primary have strict consistency, meaning that the data it provides reflects the latest writes at all times. Reads from secondaries in MongoDB have eventual consistency, meaning that changes to the system can propagate gradually and readable members are not required to reflect the latest writes at all times.
By calling rs.slaveOk() you are indicating to the system that you acknowledge that reads will be eventually consistent and wish to be able to run reverse-engineering from the secondary anyway.
General
TIP: When you encounter an unexpected issue while using Hackolade Studio, information from the application logs can be immensely helpful for our development team to diagnose and resolve the issue, ideally captured immediately after the issue occurred. Log files can be found:
- Windows: in the C:\Users\%username%\AppData\Roaming\HackoladeLogs directory
- Mac/Linux: in the Users/$USER/Documents/HackoladeLogs folder.
They may be useful to troubleshoot issues, and requested when opening a support ticket.
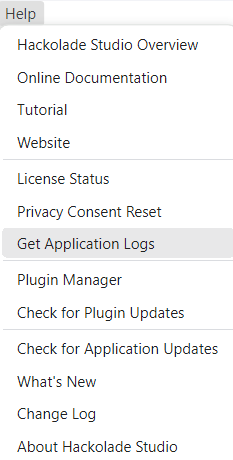
Since version 7.3.11, it is possible to access the log files folder via the menu Help > Access Application Logs
With the browser deployment of Hackolade Studio, logs are visible in the browser console and can be downloaded from the Help menu.
TIP: you may wish to perform a bulk update of properties, for example changing the color of attributes, or making a bunch of attributes required, or change enter descriptions, etc. The best way to leverage this is by leveraging the Excel export/import capability:
1) export your model to Excel
2) perform your changes in the Excel file and save it
3) import the Excel file back into your Hackolade model.