
Network proxy
By default, Hackolade Studio accesses the Internet using the proxy settings from the PC's browser, as stored in Windows Internet Options > Connections of the dialog c:\Windows\System32\inetcpl.cpl
If you have an HTTP proxy server on your network, you may have to manually set in the application the proxy parameters with the hostname or IP address of the proxy server.
You may enter this info via the menu Tools > Options > Network Proxy. Access is allowed, even if the license software key is not yet activated.
Proxy configuration can be achieved in 4 different ways:
1) using your system or browser config (preferred method, requiring no special changes in Hackolade);
2) using HTTPS_PROXY environment variables you may have used for your proxy settings
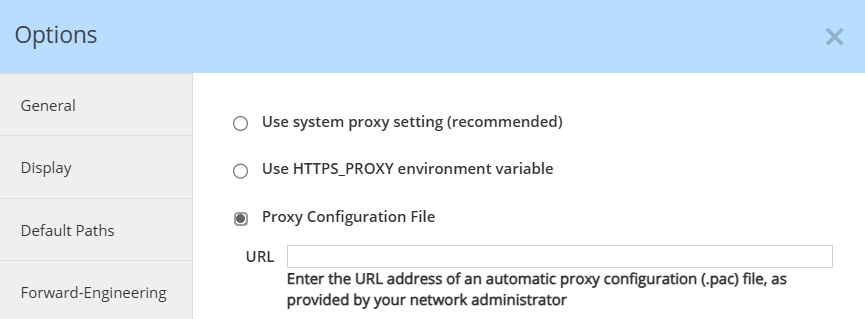
3) using a Proxy Configuration (.pac) file accessed via a URL provided by your network administrator
4) manually entering proxy address/port and possible username/password
The default setting is to use the proxy setting from you system/browser:

The HTTPS_PROXY option should only be used if you knowingly handle proxy setup through HTTPS_PROXY environment variables.
In some cases, your network administrator may have created an automatic proxy configuration (.pac) file and made it available via a URL address.
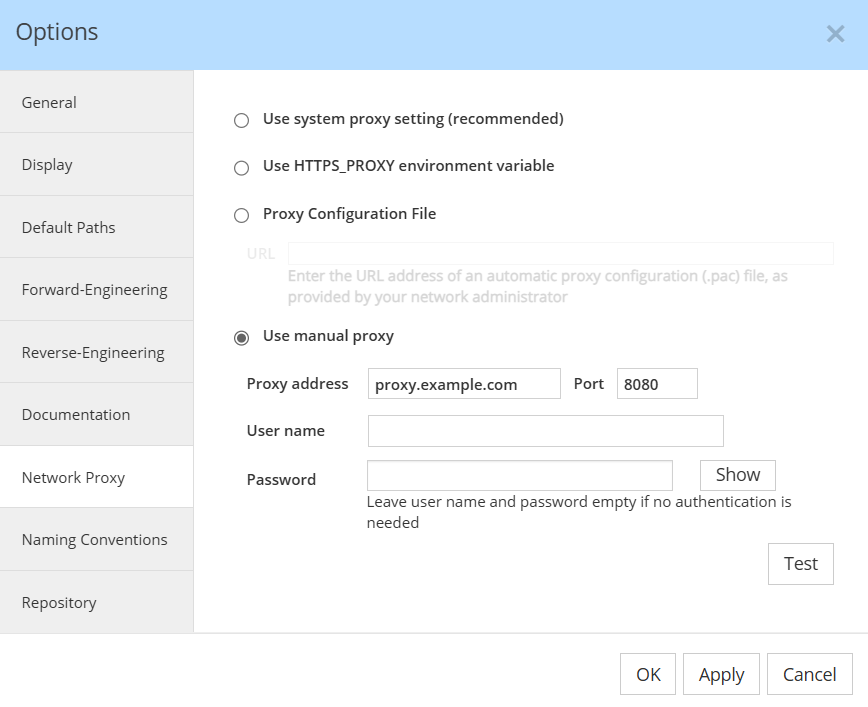
Finally, it is possible to enter the hostname or IP address of the proxy server, and the appropriate port number. If the proxy server requires a user name and password, you may include your credentials as well:
Zscaler proxy troubleshooting
Important: the following domains must be whitelisted: https://hackolade.com, https://quicklicensemanager.com, https://qlmdr.com, and https://github.com/hackolade
Warning: if you have an HTTP proxy server on your network, you may have to manually set in the application the proxy parameters. You will find more information on the Network Proxy page. In particular, in environments with proxies using SSL inspection (Zscaler, BlueCoat, etc.) it is critical that Hackolade Studio be whitelisted to connect properly with SSL/TLS protocols.
If your organization uses a ZScaler proxy which prevents license key validation, follow the steps below:
Step-by-Step Configuration in Zscaler Internet Access (ZIA)
-
Log in to Zscaler Admin Portal
- URL: https://admin.zscaler.com (or your organization's ZIA portal)
- Navigate to: Authentication/SSL Policy → SSL Policy
-
Create a New SSL Decryption Rule
- Click Add SSL Decryption Rule (or Add Rule)
-
Configure Rule Settings
| Field | Value |
|---|---|
| Rule Name | Skip SSL Decryption - Hackolade Studio |
| Action | Skip Decryption (or Bypass SSL Inspection) |
| Users/Groups | Select applicable users (or All Users) |
| Locations | Select applicable locations (or All Locations) |
| URLs | Add domains: https://hackolade.com, https://quicklicensemanager.com, https://qlmdr.com, and https://github.com/hackolade |
| URL Categories | (Optional) Select Business and Industry |
| Priority | Set to High (above general decryption rules) |
- Save and Deploy
-
- Click Save
- Deploy the policy to apply changes
Process-Based Bypass (Zscaler Client Connector)
If your organization uses Zscaler Client Connector (ZCC) with process-based policies:
- Navigate to: Client Connector Policy → Application Bypass/Exclusion
- Add your app's executable:
| Field | Value |
|---|---|
| Process Name | Hackolade.exe (Windows) or Hackolade (macOS/Linux) |
| Action | Bypass Proxy or Exclude from Inspection |
| Path | Full path to executable (e.g., C:\Program Files\Hackolade\Hackolade.exe) |
- Save and Deploy