User-defined custom properties
For each object in Hackolade Studio, we've defined a set of standard properties that appear in the properties pane. But it is possible that your organization wants to define and track its own metadata properties for models, containers, entities, and attributes. This could be for data governance reasons, and/or to leverage properties in code generation, etc...
Hackolade Studio exposes the different controls of Properties panes to provides a no-code approach: you can create and maintain custom properties, even custom tabs, simply by editing JSON configuration files. If desired, you can version those files in a version control system and share them across your organization. We recommend the use of Git as it is a lever for enabling team collaboration using the Workgroup edition of Hackolade Studio.
The values you record in custom properties are stored in the model file and are naturally exposed in documentation, JSON Schema (in full and extended compliance), Excel exports.
The location of the JSON configuration files depends on your environment:
- If you use the browser application, you can download template files from Tools > Options > Custom Properties. You can then edit those files and (re-)load them into the application.
- If you use the desktop application on Windows, you can find the JSON files in C:\Users\%username%\.hackolade\options. You can edit those files in-place.
- If you use the desktop application on MacOS, you can find the JSON files in /Users/$USER/.hackolade/options. You can edit those files in-place.
Warning: whatever your environment, you need to restart / reload the application for configuration changes to take effect!
Note that native targets (aka JSON, Couchbase, DynamoDB, MongoDB, and Polyglot) can be customized without downloading additional plugins.
Access the target customization directory
Desktop deployment
To create and maintain custom properties for a given target, you access the folder structure from Help > Plugin Manager

and choose the Installed tab:

then click on the Show plugin customization directory link for the chosen target. This link opens up a Windows Explorer or Mac Finder session in the corresponding folder. If the folder does not yet exist, it will be automatically created, along with all the necessary configuration files.
For each custom properties plugin, you will find a directory structure similar to this one:

Notes:
i) it is always necessary to restart the application after having saved changes, and before you can see these changes reflected in the properties pane.
ii) for field-level definitions, since data types have different property lists, it may be necessary to define custom properties for multiple data types.
When you open a xLevelConfig.json file, it starts with a section showing examples of how different controls are structured. Then at the end, you find the section where changes are made:

It is an array of objects, themselves containing and array of control objects.
Adding control objects inside the structure array of Details would add custom properties at the bottom the of the Details tab in the Properties Pane. If you want to define a custom tab, it would be by adding an object in the array:

To add a control object, copy from one of the examples at the top of the file, and paste it in the right place, for example:

If you need to add a custom property to a data type, but not to all data types, you must do it under the data type specific to the technology target:

Browser deployment
Given the security requirements browsers, the user experience is quite different. In the browser application, go to Tools > Options > Custom Properties.

You run both the Desktop and the Browser deployments of Hackolade Studio
No need to download any template file if you want to share the same setup of custom properties with the Desktop application (recommended.)
For each target technology, you must select the folder previously created with the Desktop application. This will typically be:
- on Windows: C:\Users\%username%\.hackolade\options\<target>\customProperties
- on Mac: /Users/$USER/.hackolade/options/<target>/customProperties (note: use Cmd+. to display hidden folders)
Each time you make changes to the custom properties config files, you must reload the browser page.
You only run Hackolade Studio in the browser
Download the template file (zip file) by clicking the link provided. For each target, you must create a folder structure based on the zip file containing structure and templates. You must unzip the archive, and we suggest to store it all under:
- on Windows: C:\Users\%username%\.hackolade\options\<target>\customProperties
- on Mac: /Users/$USER/.hackolade/options/<target>/customProperties (note: use Cmd+. to display hidden folders)
You may then edit the files according the instructions below. Once you are done editing those files, you need to load them in the application using the directory picker. Note that your configuration remains local to your machine: the JSON files are persisted in your browser and restored across sessions but they are never sent to a remote server.

Levels
As a reminder, terminology differs between the targets supported by Hackolade:
- container means: dbs in MongoDB, region in DynamoDB, and bucket in Couchbase, namespace in Avro, keyspace in Cassandra, schema in RDBMS, etc...
- entity means: collection in MongoDB, table in DynamoDB and Cassandra and RDBMS, and document type in Couchbase,etc...
- field means: field in MongoDB and Couchbase, and attribute in DynamoDB, column in Cassandra and RDBMS, etc...
You need to edit the corresponding <object>LevelConfig.json file to add custom properties.
Tabs
Note: tabs in Properties Panes were originally placed at the bottom. To make them more visible, they were subsequently moved to the top.
For each level, the Hackolade properties pane may have one or more lower tab:
- MongoDB model tab:

- MongoDB dbs tab:

- MongoDB collection tab:

- MongoDB field tab:

If the level allows multiple tabs, you need to choose to which tab you want to add properties.
Property types
The following controls are possible for user-defined properties:

- simple text: one line of text
- text area: popup for multi-line text entry
- dropdown selection (unique) from a defined list of options
- dropdown selection (multiple) from a defined list of options
- numeric-only field
- checkbox: for true/false entry
- group: addition of a set of properties of given control type
- field list: selection from list of fields
- field list with attributes: selection from list of fields with attributes
More information here.
Property definition
Examples are provided in the comments section of each config file. Here's an overview of the schema:

Here's another view, consolidated:

- propertyName: mandatory, this is the property label that will appear in the Property Pane
- propertyKeyword: mandatory, this is the unique key for the property
- shouldValidate: optional, boolean true/false to define whether to validate the regular expression of the text input [default: false]
- propertyTooltip: optional, in the case of input types textarea and select, it is possible to display a tooltip defined here
- propertyType: mandatory, this is the control definition, with possible values: text, details, select (i.e. dropdown), checkbox
- options: optional, this is the array of possible checkbox options
- template: optional, this is needed in the case of propertyType = details, to define a popup multi-line text. Possible value: textarea
- valueType: optional, this is needed in to specify that a property is numeric only. Possible values: numeric
Share customization with team members
It is recommended that you share customization using Git. Store your changes in a Git remote repository, and have your team members clone it locally in C:\Users\%username%\.hackolade\options (on Mac in Users/$USER/.Hackolade/options) That way, all that teams members need to do is to pull regularly, and they will get your latest changes.
For custom property changes to take effect on each computer, it is required to exit Hackolade Studio and restart it.
One-time setup of the Git repository for the organization's custom properties
This step is required once per organization, to be executed by the Hackolade Studio superuser or maintainer.
The process to git-enable your options folder may vary, depending on your OS and your repo provider. Here is an example using GitHub and Windows:
1) in Windows Explorer, go to C:\Users\%username%\.hackolade\options and make sure that the folder is empty.
2) if the folder C:\Users\%username%\.hackolade\options is not empty, then cut the content and place it in a safe place
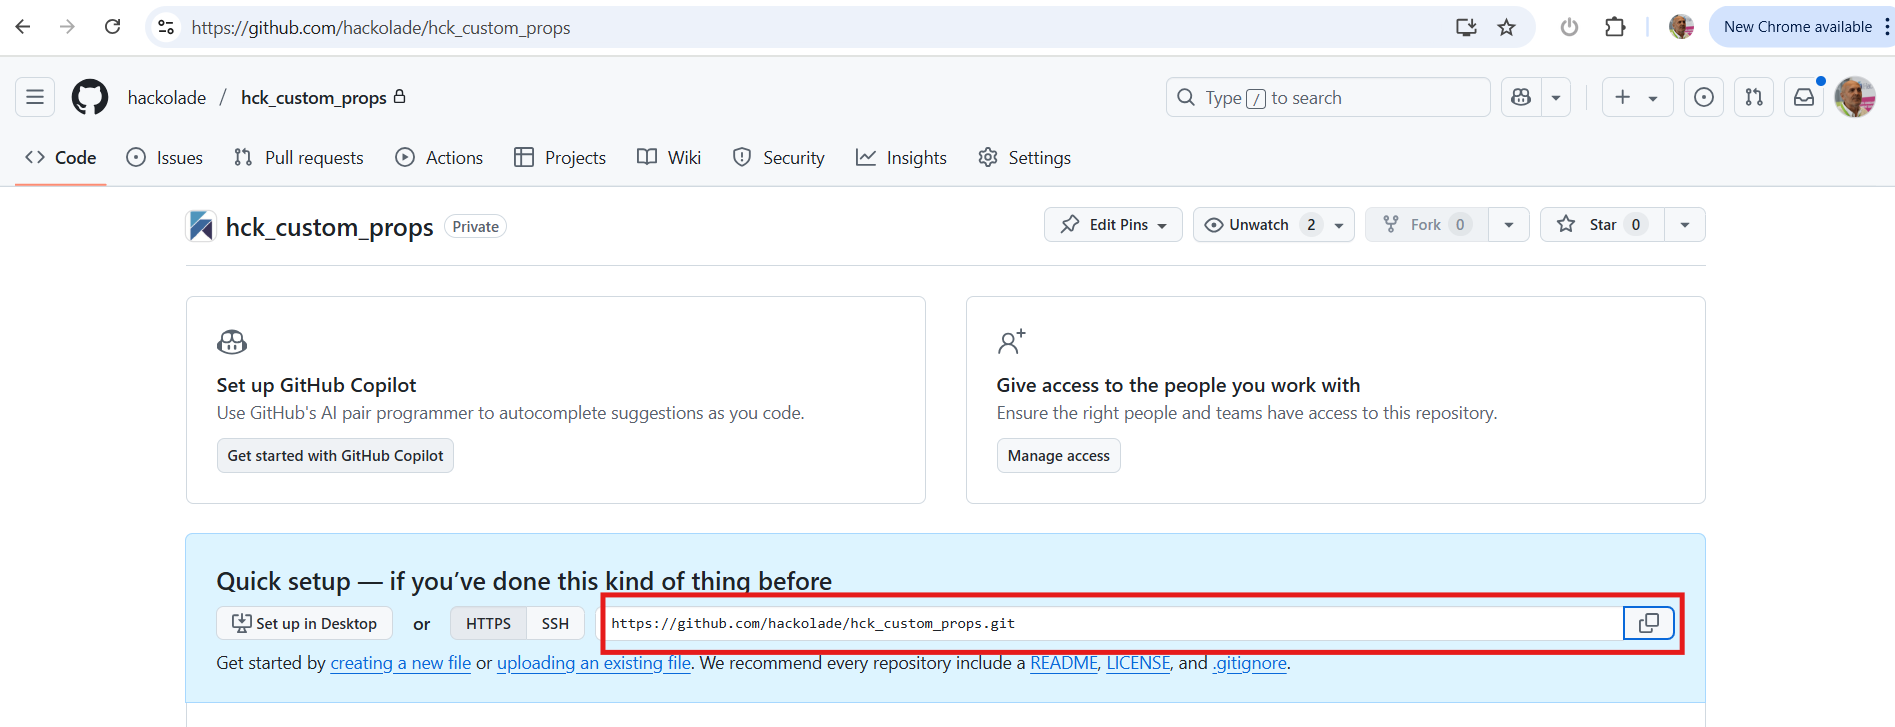
3) in GitHub, create a new repository, for example called "hck_custom_props" and copy the Git URL, for example in our case "https://github.com/hackolade/hck_custom_props.git" (finishing in .git)

4) in Hackolade Studio, go to the repository context (or the menu option "Repository > Open Repository Context, or keyboard shortcut Ctrl + G)
5) in the top bar, select the Source "URL", then paste the Git URL you had copied in step 3), then click the Clone button

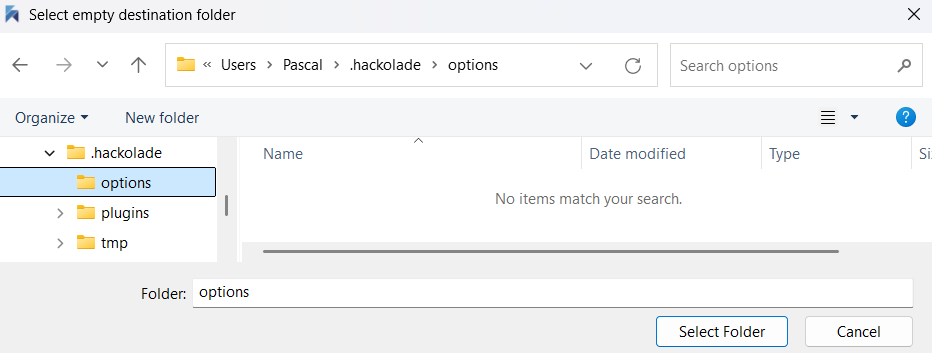
6) in the OS destination folder dialog, select the folder C:\Users\%username%\.hackolade\options which must be an empty folder

7) if you had in step 2) to put in a safe place previous content of the options folder, now is the time to copy it back to the C:\Users\%username%\.hackolade\options folder
8) commit and push to the central remote repository the changes of step 7) and any other changes to custom properties
One-time setup of each user's custom properties
When a new user installs the application, it should be part of the organizations documented process, right after license key validation, to clone locally the organization's custom properties repository.
1) in Hackolade Studio, go to the repository context (or the menu option "Repository > Open Repository Context, or keyboard shortcut Ctrl + G)
2) in the top bar, select the Source "URL", then paste the Git URL you copied in step 3) , then click the Clone button

3) in the OS destination folder dialog, select the folder C:\Users\%username%\.hackolade\options which must be an empty folder

4) select or possibly clone locally the models repository
Share custom properties changes with Hackolade Studio users
When the superuser(s) or maintainer(s) develop, fine-tune and test new or adapted custom properties, it is useful to share them with the rest of the Hackolade Studio community of users in the organization.
They should:
1) using Hackolade Studio, select the custom props repository
2) go to the Commit screen and click the Push button
3) notify your community of Hackolade users to pull the changes from the remote repo of custom properties
4) go back to your models repository
Other users should simply:
1) using Hackolade Studio, select the custom props repository
2) go to the Pull screen and click the Pull button
3) close and restart Hackolade Studio
4) go back to your models repository
Models with custom properties lacking configuration
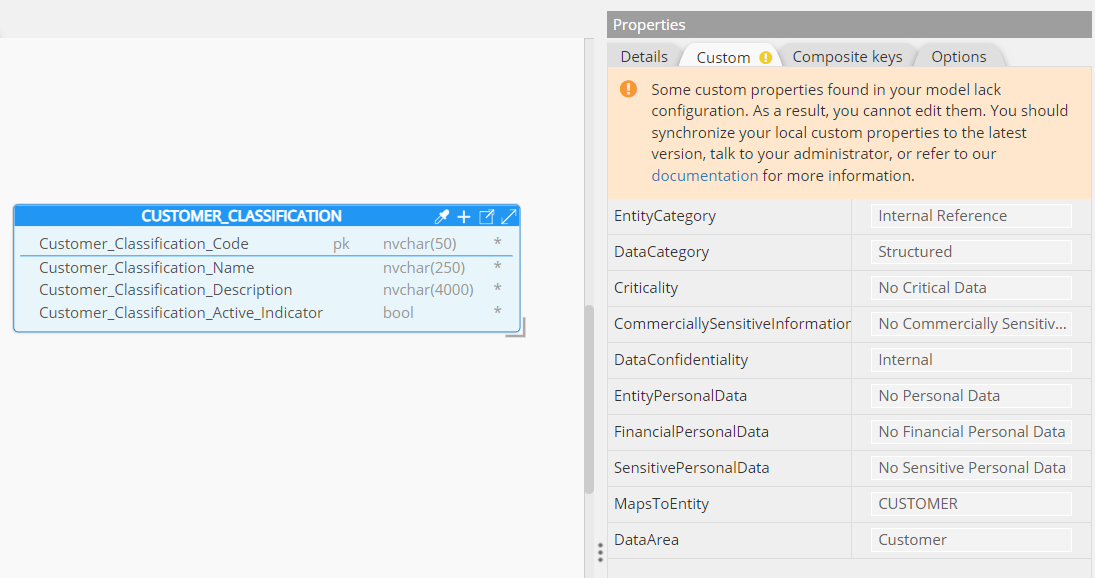
It is possible that you might be opening a model in which some custom properties were recorded, and and for which you don't have the configuration. In such case, we display a custom tab with a warning badge to alert you of this situation.

You may have to synchronize or pull the latest version of the custom configuration, or adjust your configuration to match the custom properties in the model.