
Azure DevOps repo setup
This guide details the steps to configure an external application to securely authenticate and interact with Azure DevOps using a Microsoft Entra ID app registration. This flow is intended to be used for service-to-service integrations (aka no user interaction).
Prerequisites
In Azure DevOps Repos, the user executing the steps below must have access to the settings of the project containing the models, plus Admin role to grant permissions
In the Azure Portal
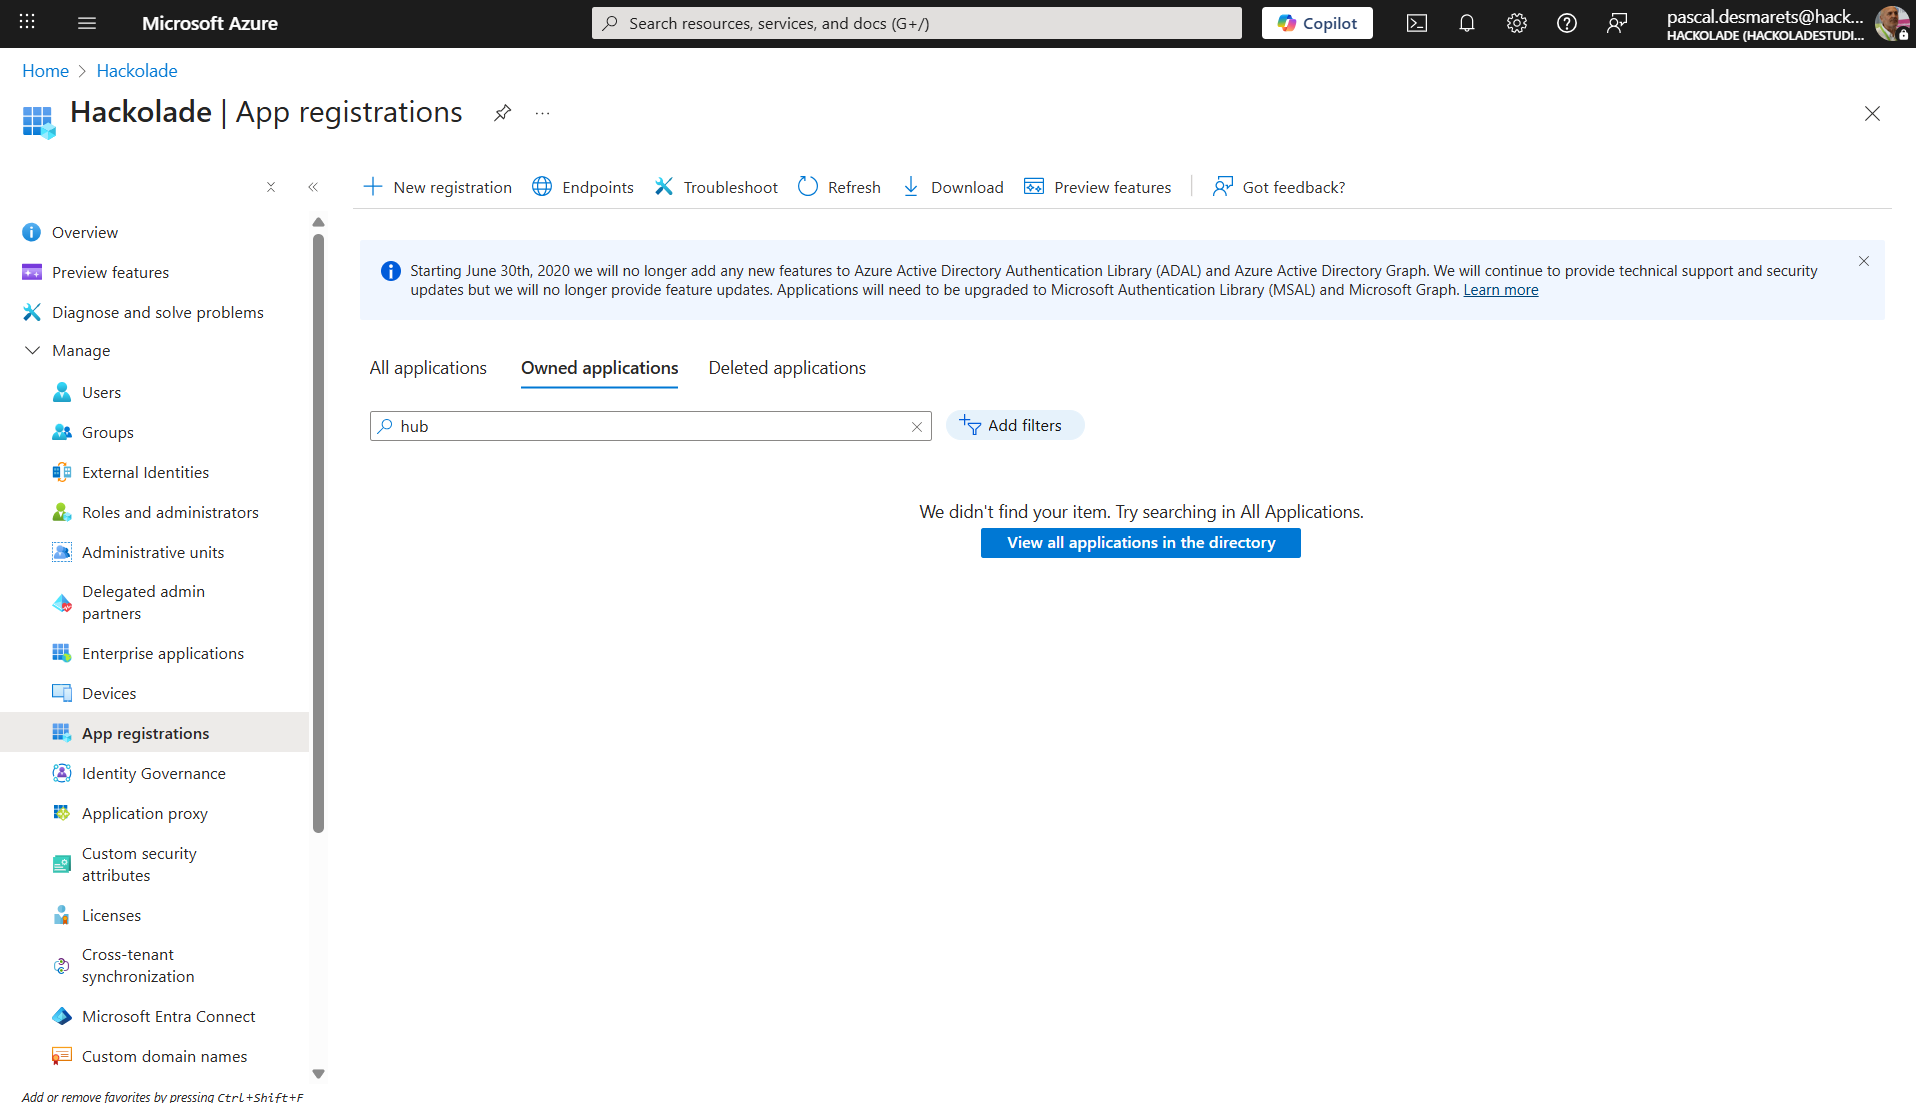
In the Azure Portal, go to Microsoft Entra ID > Manage > App registrations
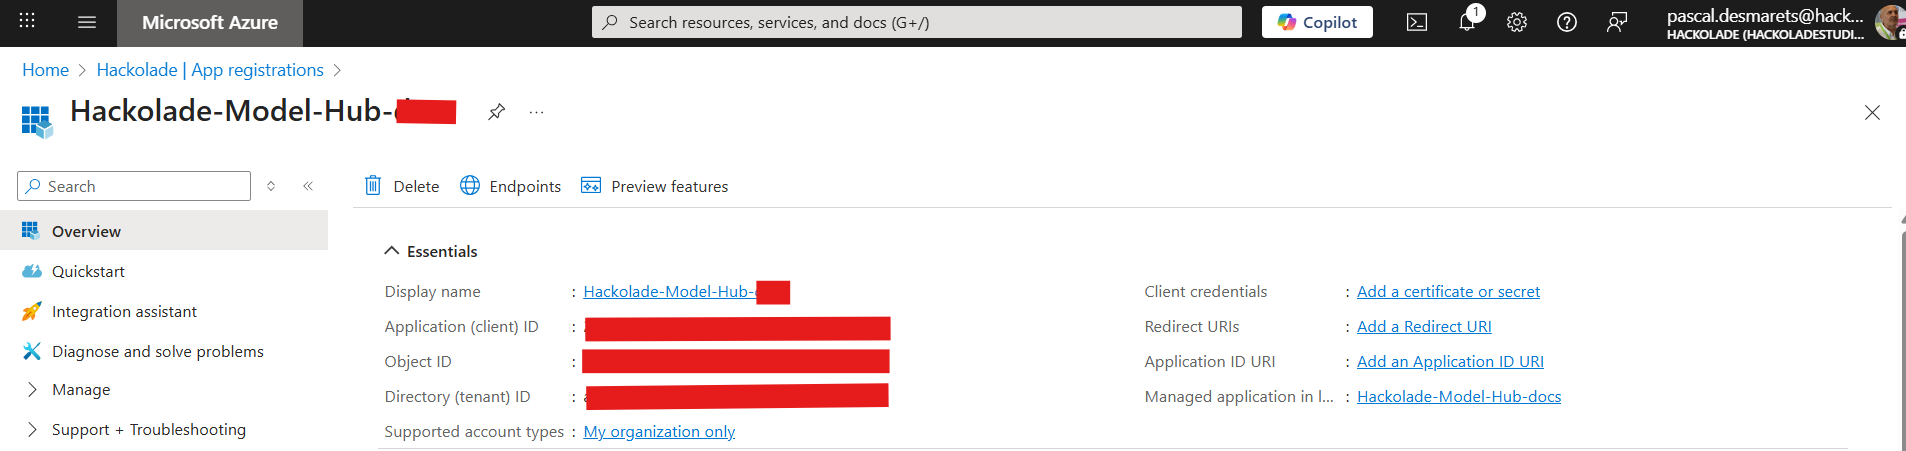
Create a Microsoft Entra ID App Registration (Service Principal)
This section describes how to declare your application as a service principal in Entra ID.
To register the application, execute the following steps:
- click on New registration
- enter a meaningful Name (e.g. Hackolade-Model-Hub-prod)
- select Accounts in this organizational directory only (single-tenant) or as required
- leave Redirect URI blank (not needed for Client Credentials Flow)
- click the Register button
Important: save the essential tenant ID and client ID, as you will need to use them in a later phase
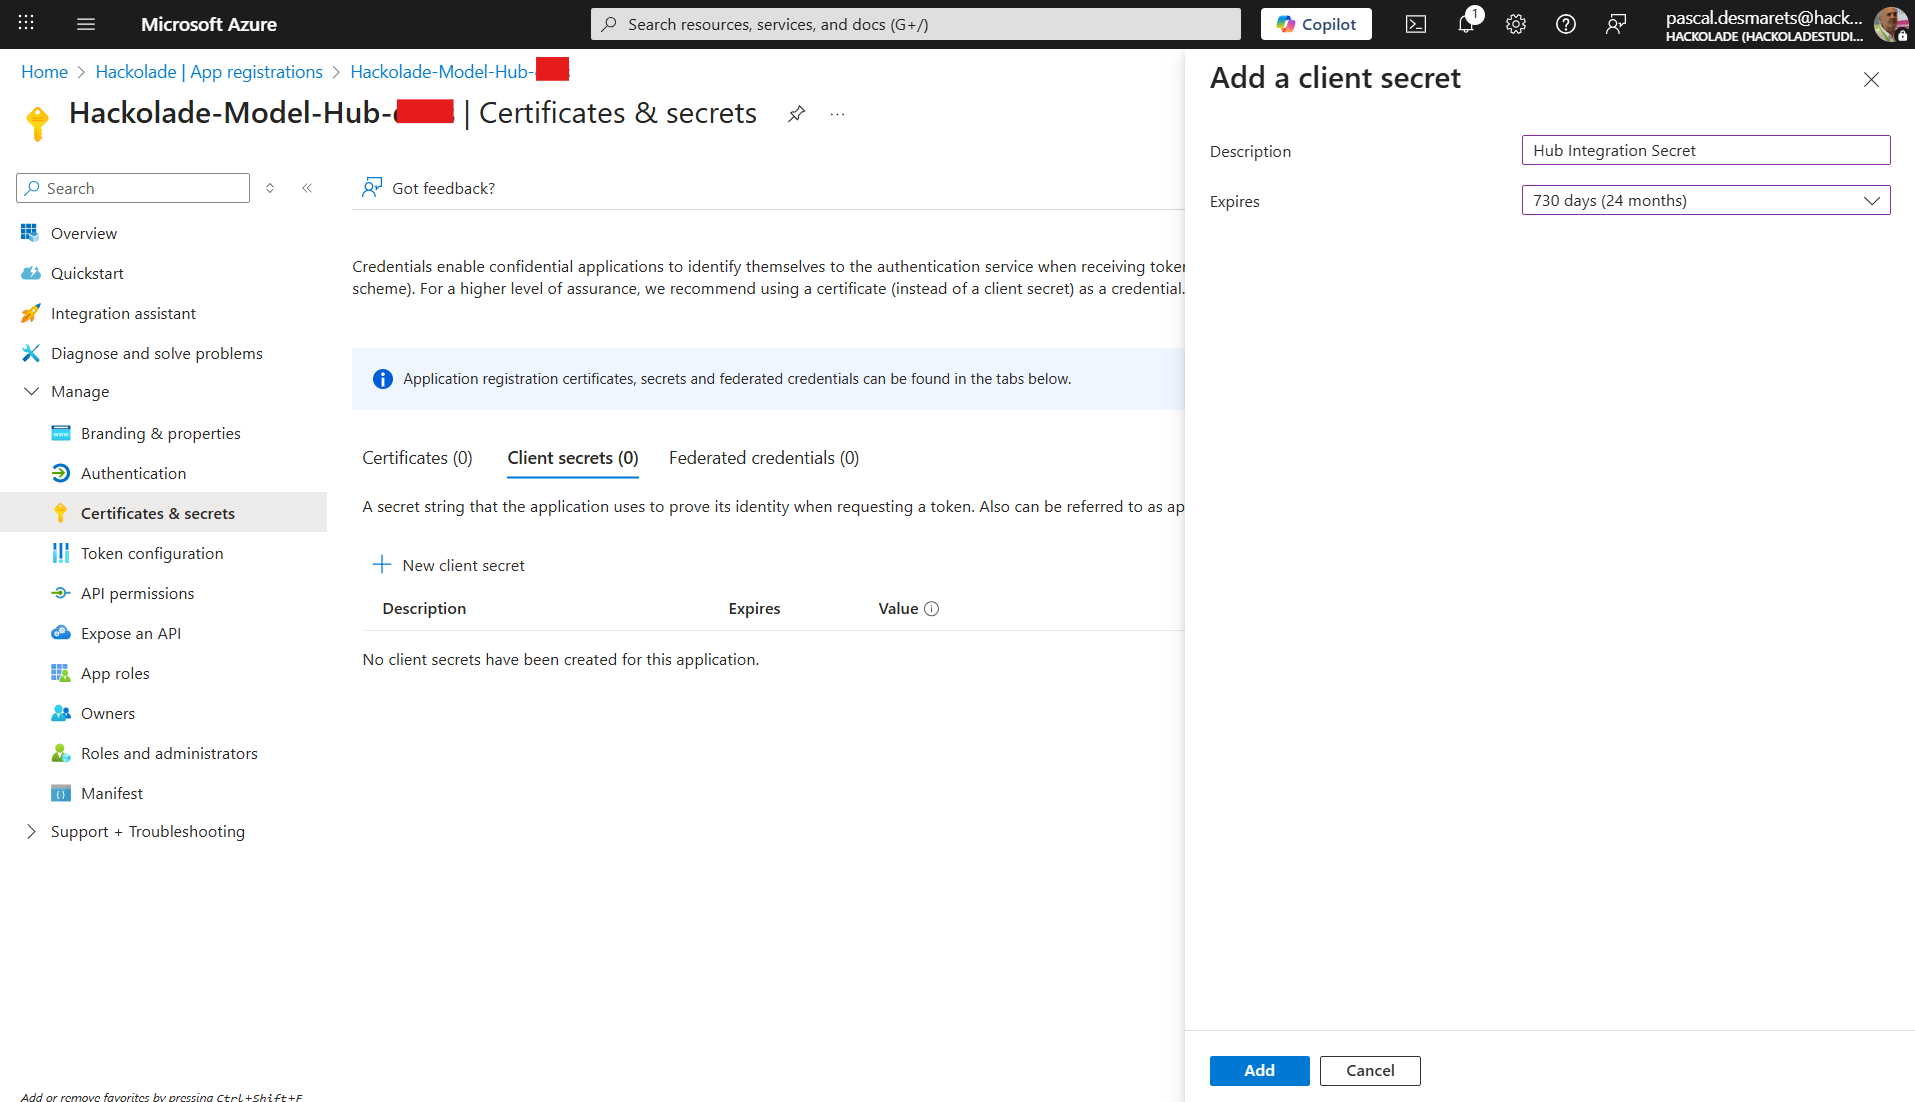
Create an Application (client) Secret
After successfully registering your application, you must generate a Client Secret (App Secret). This secret acts as a password for your application when authenticating with Azure, and its value is essential for configuring the Azure connection in your Model Hub instance.
In the Azure Portal still, follow the steps below:
- find and select the application you just created
- in the side menu for your registered app, select Manage > Certificates & secrets
- under the Client secrets tab, click the button + New client secret
- in the form, provide a clear Description (e.g., "Hackolade Model Hub integration secret") and set the Expires duration (e.g., 1 year or 2 years) as required by your security policy
- click the Add button
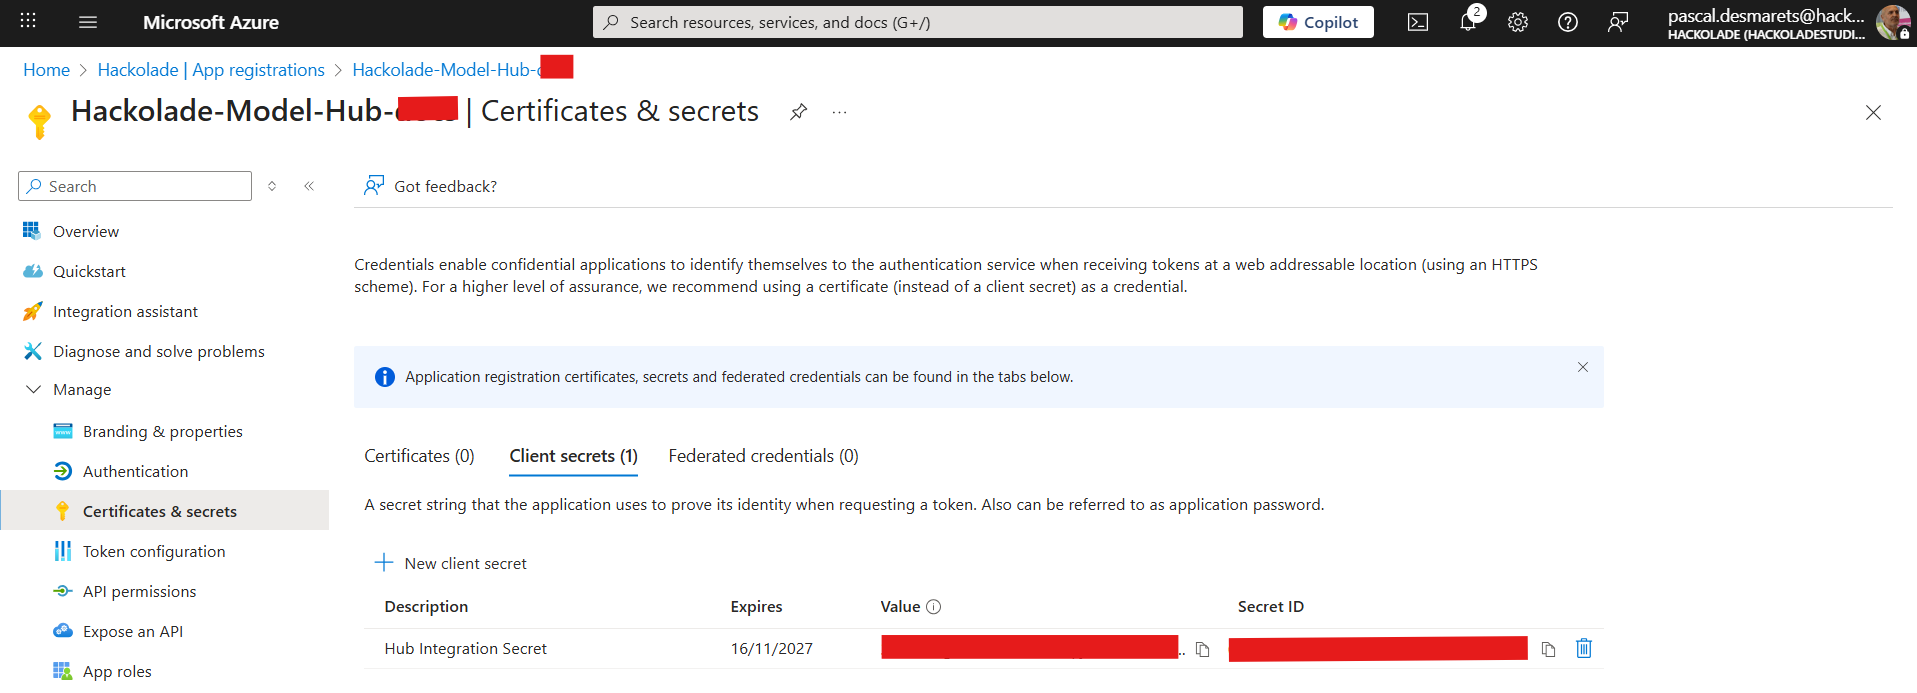
- immediately after the secret is created, the new secret's Value will be displayed in the table. This is the only time the secret value will be visible.
Important: copy the Value of the new secret and save it securely. If you lose this value, you will need to create a new secret
Your application secret is listed in the following screen
In Azure DevOps
Grant the Service Principal access to Azure DevOps Repos
Attention: this step does not take place in the Azure Portal. It must take place in the selected repository of the Azure DevOps Repos for your organization
A service principal in Azure DevOps is an identity created for use with applications, services, and automation tools to authenticate and access Azure resources programmatically. It acts as a secure application identity with permissions assigned through Azure Role-Based Access Control (RBAC), enabling Azure DevOps pipelines or tools to interact with Azure resources without needing a user login. Essentially, it is an authorized security principal representing an application, with a client ID and client secret used for authentication in Azure DevOps workflows.
To grant the service principal access to Azure DevOps, you must add it to your Azure DevOps organization/project like a traditional user.
Follow the steps below:
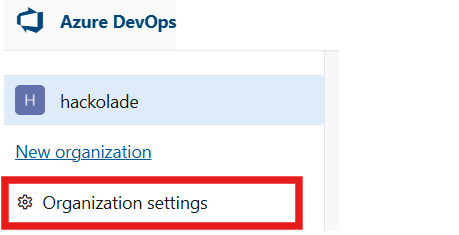
- navigate to your Azure DevOps organization.
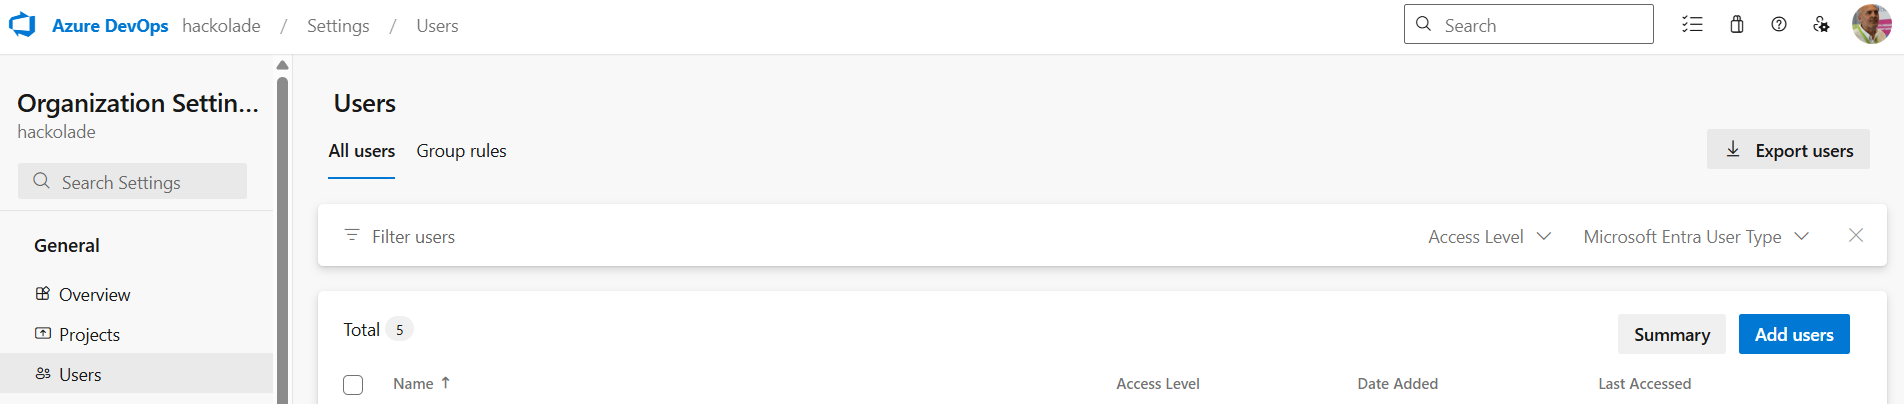
- go to the Organization settings option at the bottom of the left pane
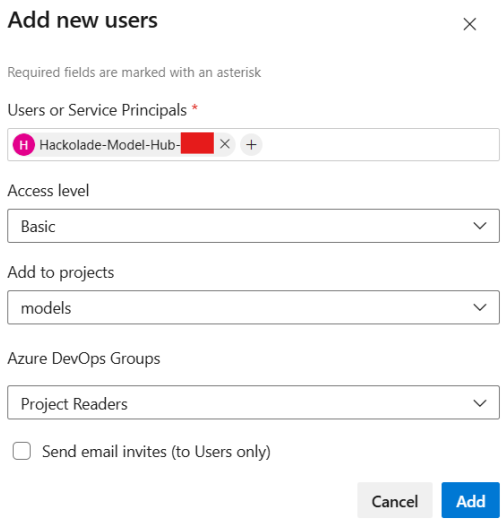
- then choose Users and click the button Add users
- in Users, start typing the the app's display name (from registration) and select it when it appears. (Avoid using the client ID directly; use the name for reliable search.)
- assign an Access level as Basic
- select the Project or Projects
- for the Project, assign Azure DevOps built-in roles such as Project Reader for read-only access.
- click the Add button
NOTE: for more information on built-in roles, see Azure DevOps permissions.
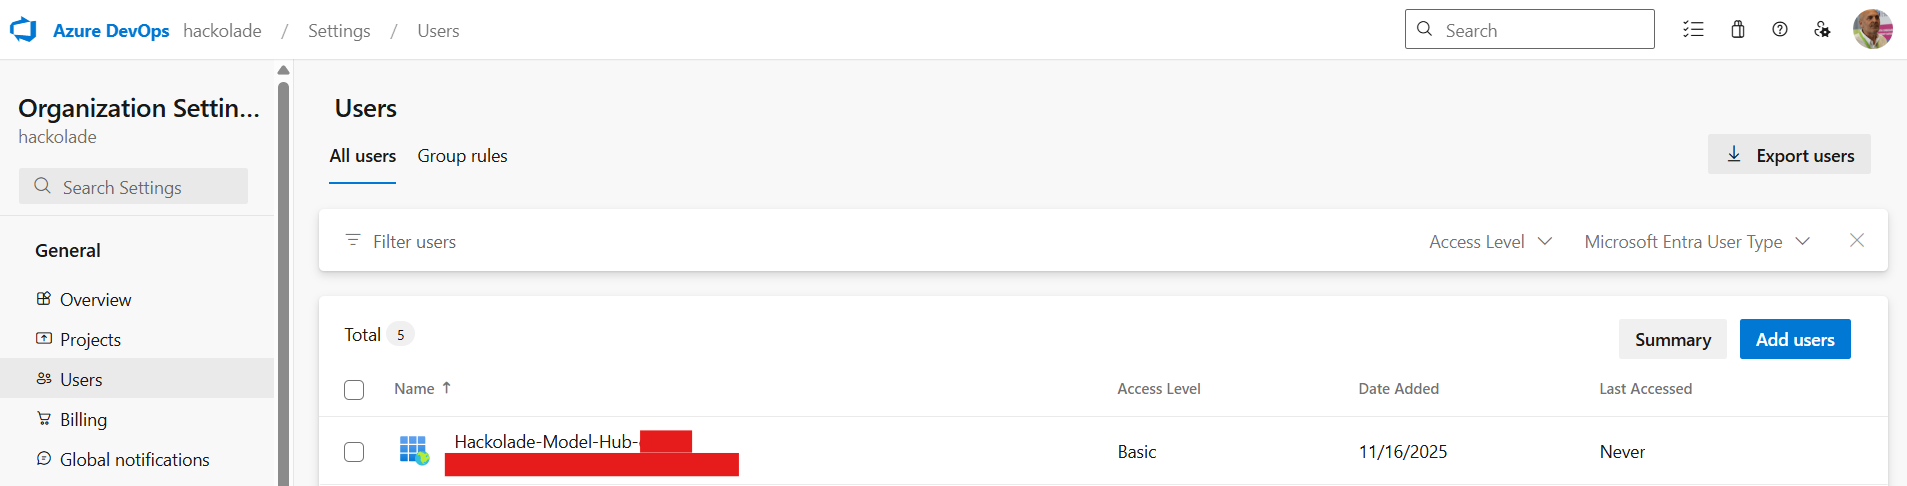
Your organization users are listed in the following screen
Create a webhook
An Azure DevOps webhook enables sending JSON payloads for repository events like code pushes, pull requests, and repository changes to external HTTPS endpoints. These integrate repos with services such as CI/CD tools or notification systems via service hooks.
This is how the Hackolade Model Hub gets notified of the creation of a new model or change to an existing model in any folder of the default branch for your repository, or repositories.
To create a Azure DevOps webhook, follow the steps below:
-
navigate to your your project
-
at the bottom of the left column, select Project Settings
-
in the Project settings menu, click on Service hooks
-
click the + sign to create a new subscription
-
from the list of available services, select WebHook, then click Next

-
configure the Triggering Event and Filters:
- for event trigger, select Code pushed.
- Select the repo and branch in the filters as required for your project. You must choose the branch that has been set up as the default branch, generally "main". Currently it is not possible to send webhook event to the Model Hub from any branch that then default branch.
- Group should be [Any]

-
in the Action section, configure the following:
- URL: Enter the sync endpoint of your Hackolade Model Hub. This typically follows the format: /gateway/public/sync endpoint of your Model Hub domain (e.g., https://<your organization>.hackolade.com/gateway/public/sync)
- Create Basic Auth credentials, username and password, to secure the connection. You must preserve this username and password in a safe place. They will need to be entered in the Model Hub admin screen, as described below.

- leave the rest of the for as is:
Your project webhooks are listed in the following screen

In the Hackolade Model Hub admin panel
Once the previous steps are all completed, go to the the Git Providers tab of the admin panel, then click on the button + setup Git Provider, and select Azure DevOps.
Create the Azure DevOps repository provider
Webhook URL: enter the sync endpoint of your Hackolade Model Hub, and already used above. This typically follows the format: /gateway/public/sync endpoint of your Model Hub domain (e.g., https://<your organization>.hackolade.com/gateway/public/sync)
Use the Tenant ID, Client ID, Client Secret and Basic Auth credentials saved during the execution of the previous steps to configure the Model Hub.

Link to the repository source
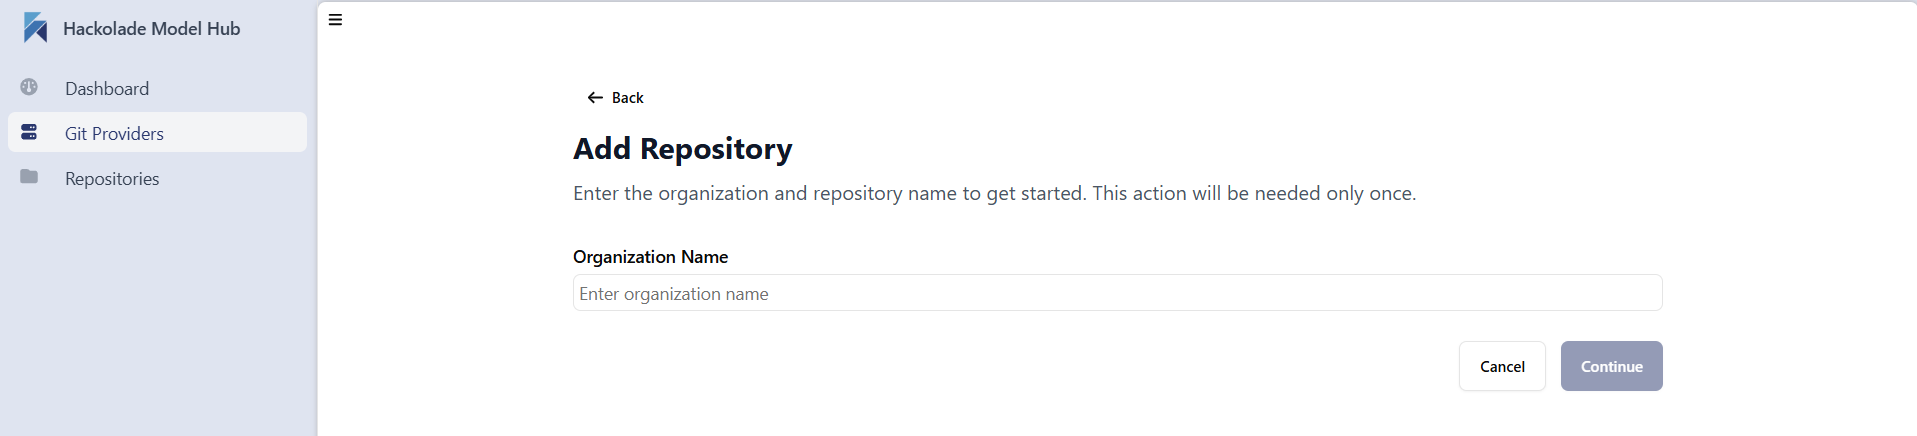
Once connected to the Azure DevOps instance, you must add add the repository or repositories before syncing the models.

Click on the Start button to reach the Add repository screen, then type the name of your oraganization in Azure DevOps:
The screen retrieves the visible repos by project. You can select one or more repositories to be replicated into the Model Hub database:

It may take some time to execute the first replication, depending on the number or repositories and their size:
Troubleshooting
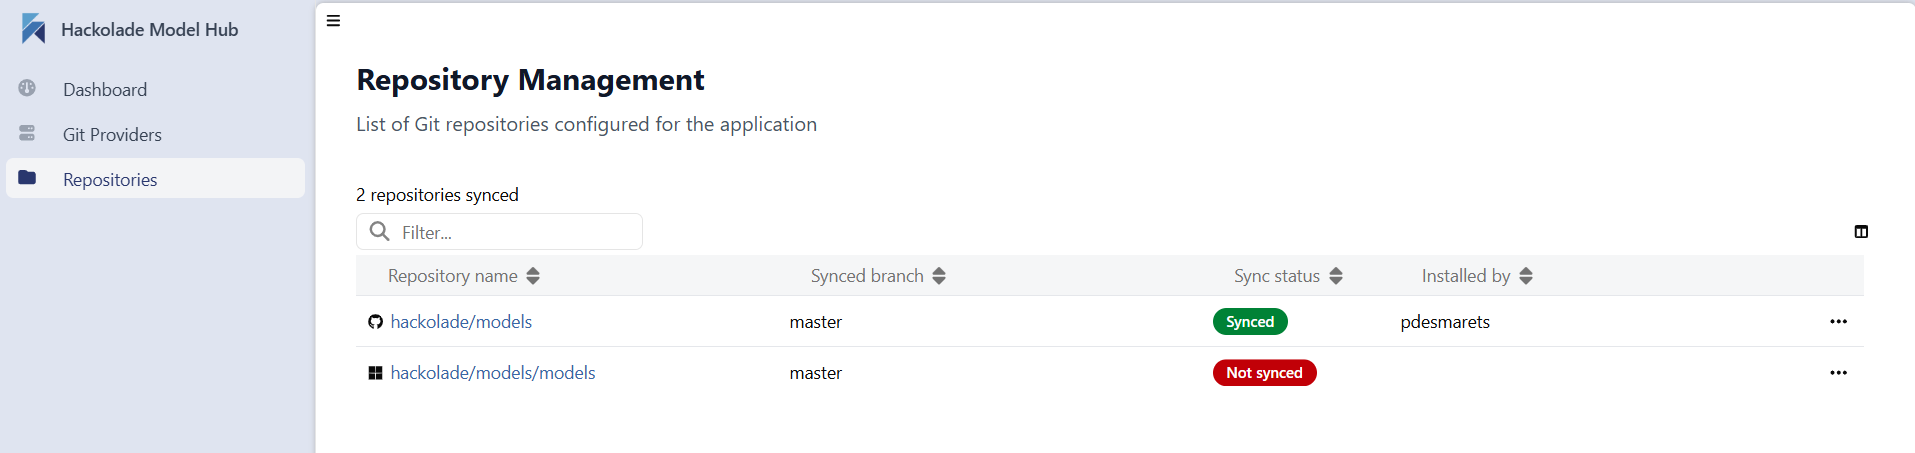
If after a few minutes, the Model Hub database does not show your models, go to the Repositories tab of the admin panel to view the sync status of your repository of repositories.

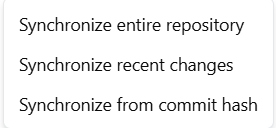
If you think that your Model Hub database is not in sync with a repository, it is possible to manually start one of 3 separate actions
If you have reasons to believe that the database is not receiving models from your Azure DevOps repository, you can view in AzureDevops whether the webhook is delivering as expected.
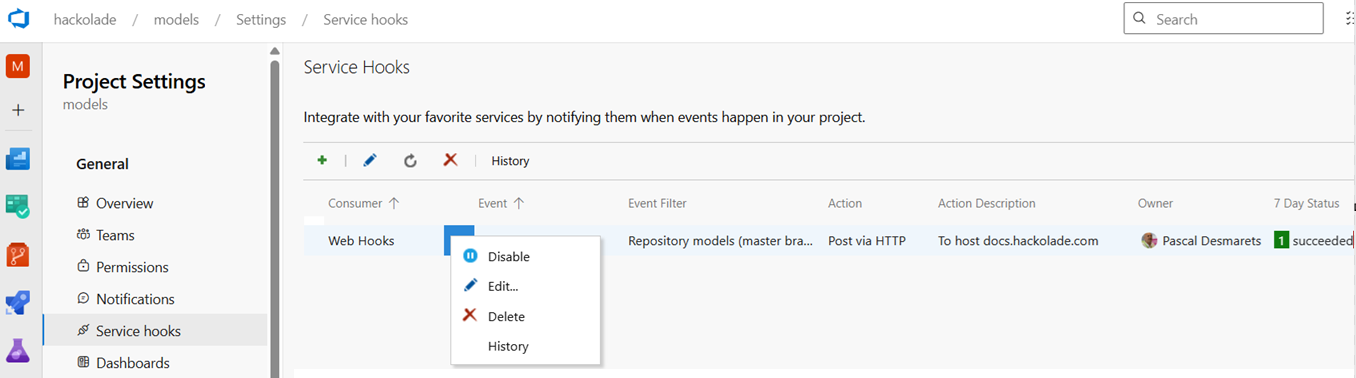
To access the Azure DevOps webhook created previously, select you project, then at the bottom of the left column, select Project Settings, then click on Service hooks.
For the Model Hub web hook, click on the 3-dots to display the menu and click Edit...
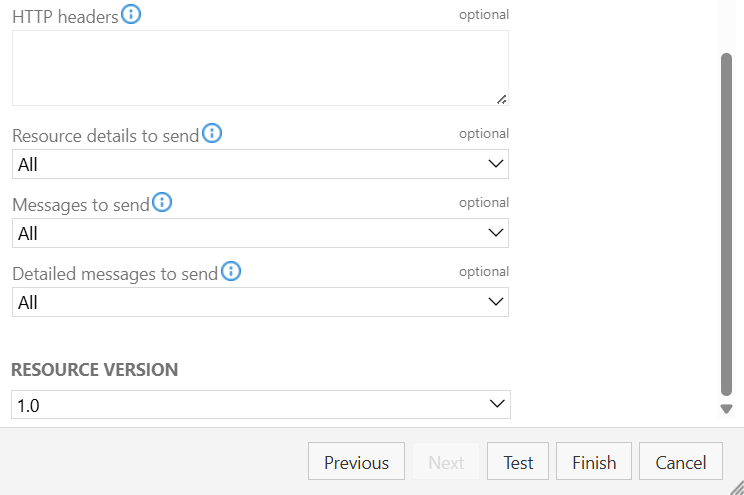
Then click Next to get to the Action screen, then click the Test button:
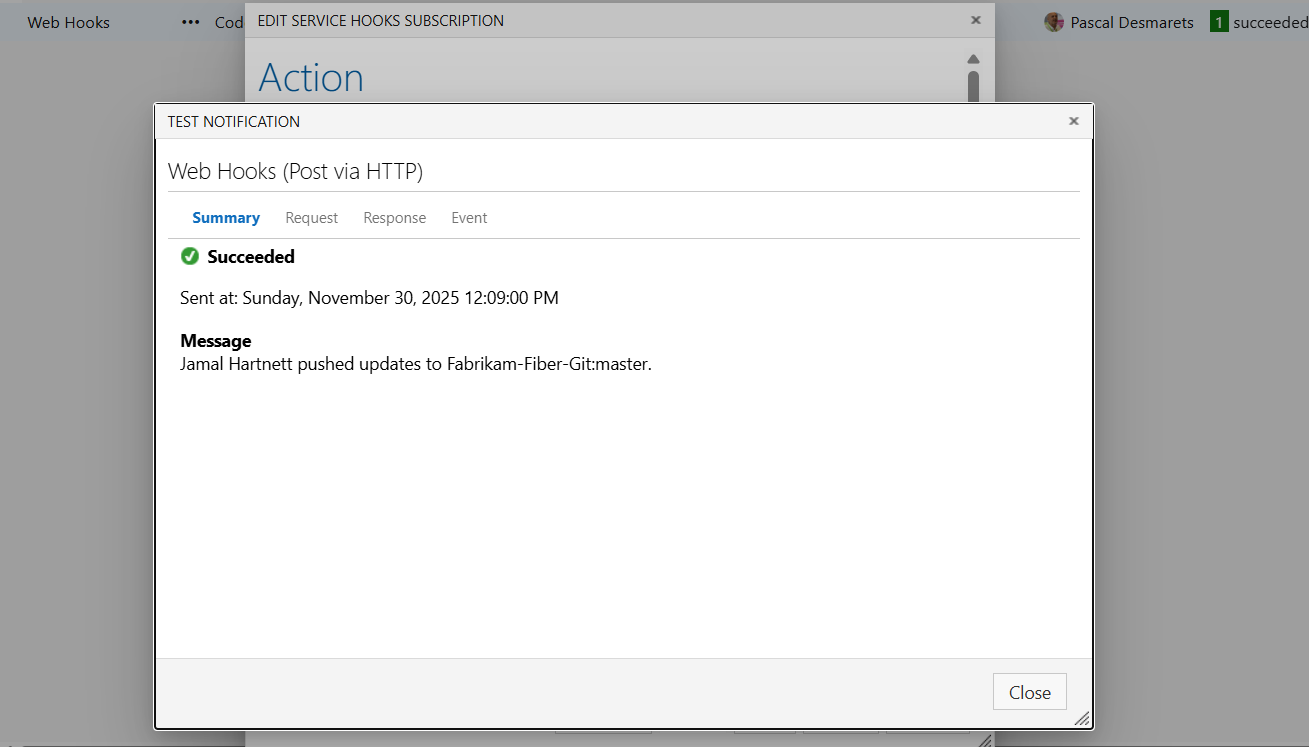
If you do not get a successful 200 response, please provide the full response to the Hackolade helpdesk at support@hackolade.com

Configure an additional repo for replication to the Model Hub
It is possible that you might need to add one or more repositories to the existing list of repos already being replicated to the Model Hub. This action must take place on GitHub.