

Integrating with Azure Entra ID
On this page, you will find a step-by-step guide to integrating Azure Entra ID with the Model Hub portal.
Pre-requisites
In order to perform the operations in this guide, you will need the following:
- access to Entra ID that allows creating and managing an app registration in EntraID
- be able to assign users to app roles
1. Create an app registration
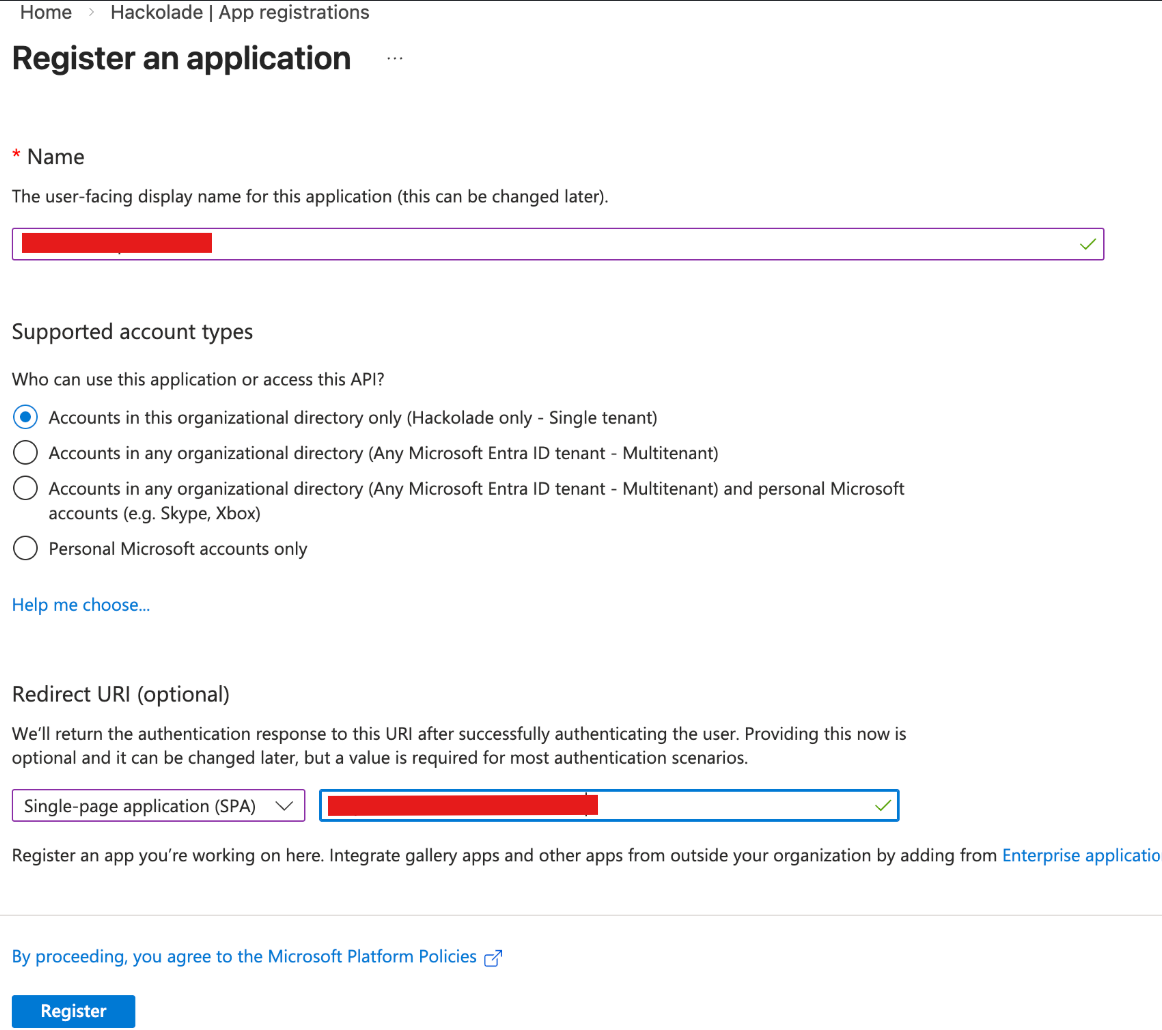
In Azure EntraID, select Manage -> App registrations, then click on + New registration
Give a name to your app and as a redirect URI select Single-page application (SPA) and the value is the domain name of the Model Hub portal (eg, https://hck.example.com/hub)
2. Configure Redirect URIs
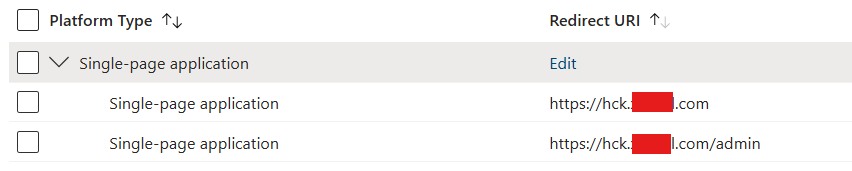
When creating the application, we configured the redirect URI to access the Model Hub application, but we need to add another one to log in from the admin application as well.
- In Azure Entra ID, select Manage -> App registrations, then click on the app you just created
- In the Overview page, click on Redirect URIs. At this point, you should see it as 0 web, 1 spa, 0 public client
- Click on the Edit button on the line of Single-page application

- Add the admin URI, which is the same as the current URL with an /admin suffix (e.g https://hck.example.com/admin). Then click on Configure
3. Create a new app roles
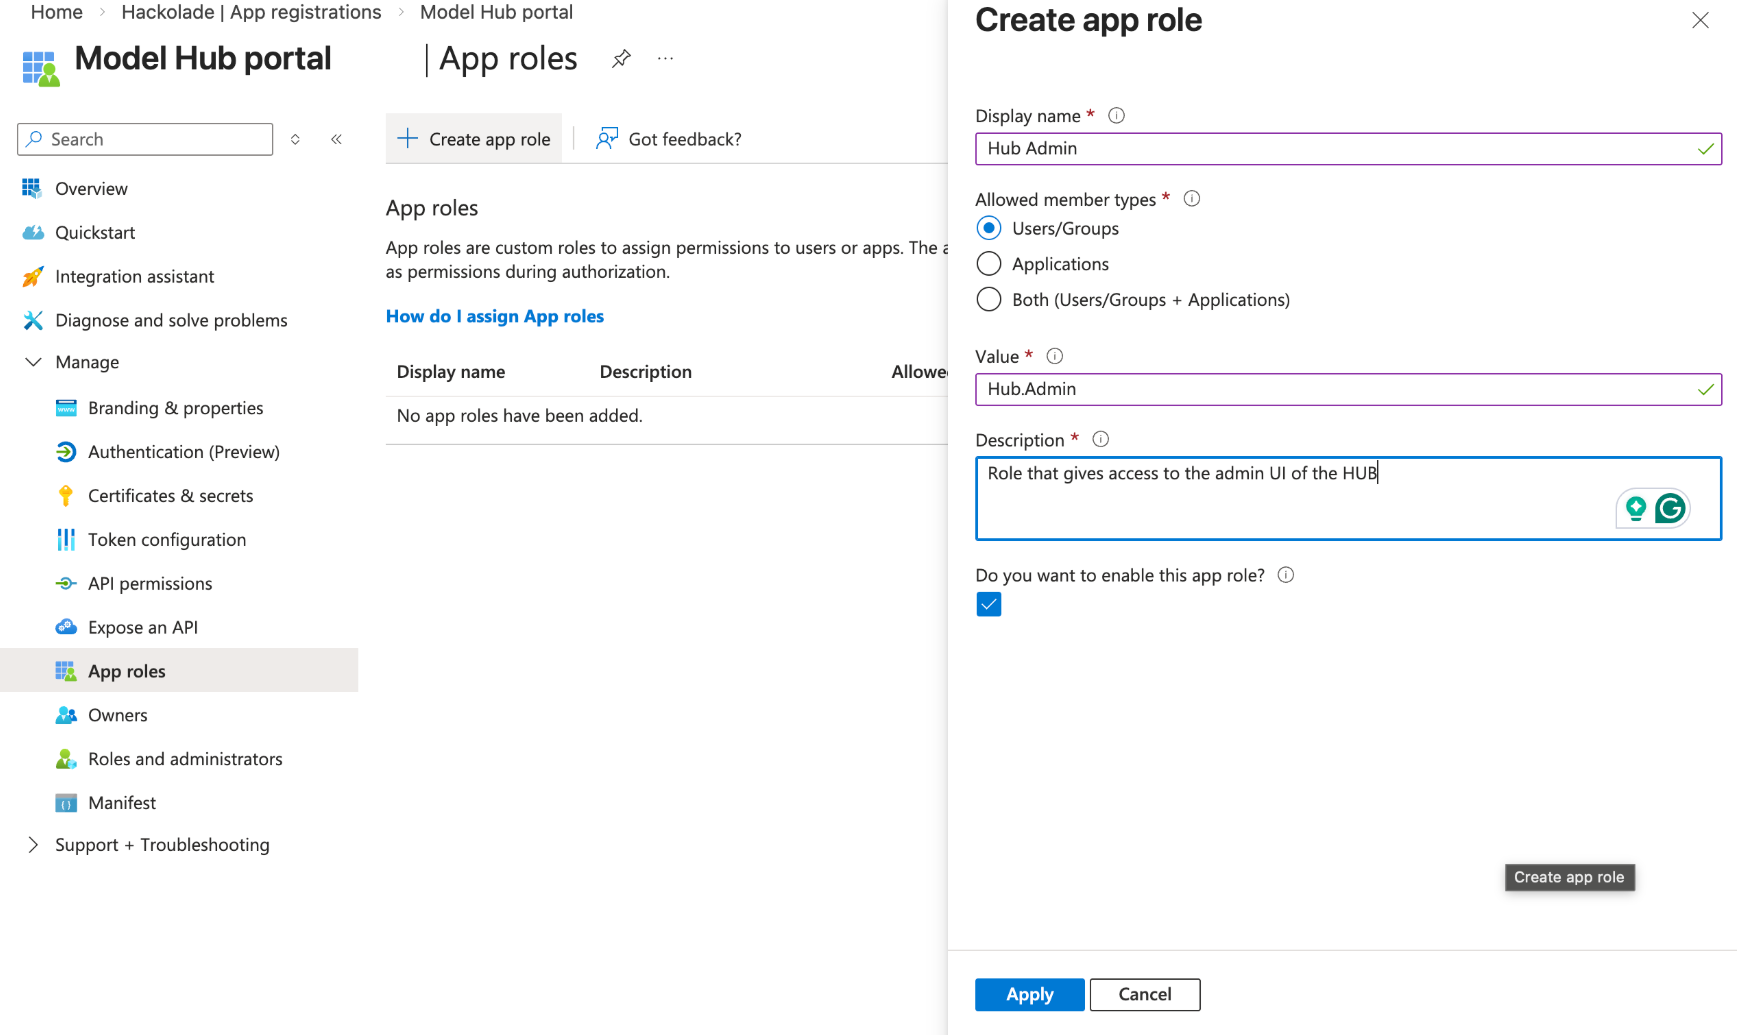
In order to give users access to the Model Hub portal and its admin interface, you must create two app roles.
-
In Azure Entra ID, select Manage -> App registrations, then click on the app you just created
-
Click on Manage -> App roles
-
Click on Create app role, then fill the form with the following information
- Display name: Model Hub User
- Allowed member types: Users/Groups
- Value: Hub.User
- Description: Role that gives access to the Model Hub portal
- Make sure that "Do you want to enable this app role?" is checked
-
Click again on Create app role, then fill the form with the following information
- Display name: Model Hub Admin
- Allowed member types: Users/Groups
- Value: Hub.Admin
- Description: Role that gives access to the admin UI of the Model Hub portal
- Make sure that "Do you want to enable this app role?" is checked
-
Then click on Apply
4. Enable access token version 2
Even though we are using the v2.0 endpoints, Entra ID is still generating access tokens with the v1 issuer. This makes it hard to validate the issuer in the access token, since it doesn't correspond with the one returned by https://login.microsoftonline.com/TENANT_ID/v2.0/.well-known/openid-configuration
In order to have the v2 access tokens:
- In Azure Entra ID, select Manage -> App registrations, then click on the app you just created
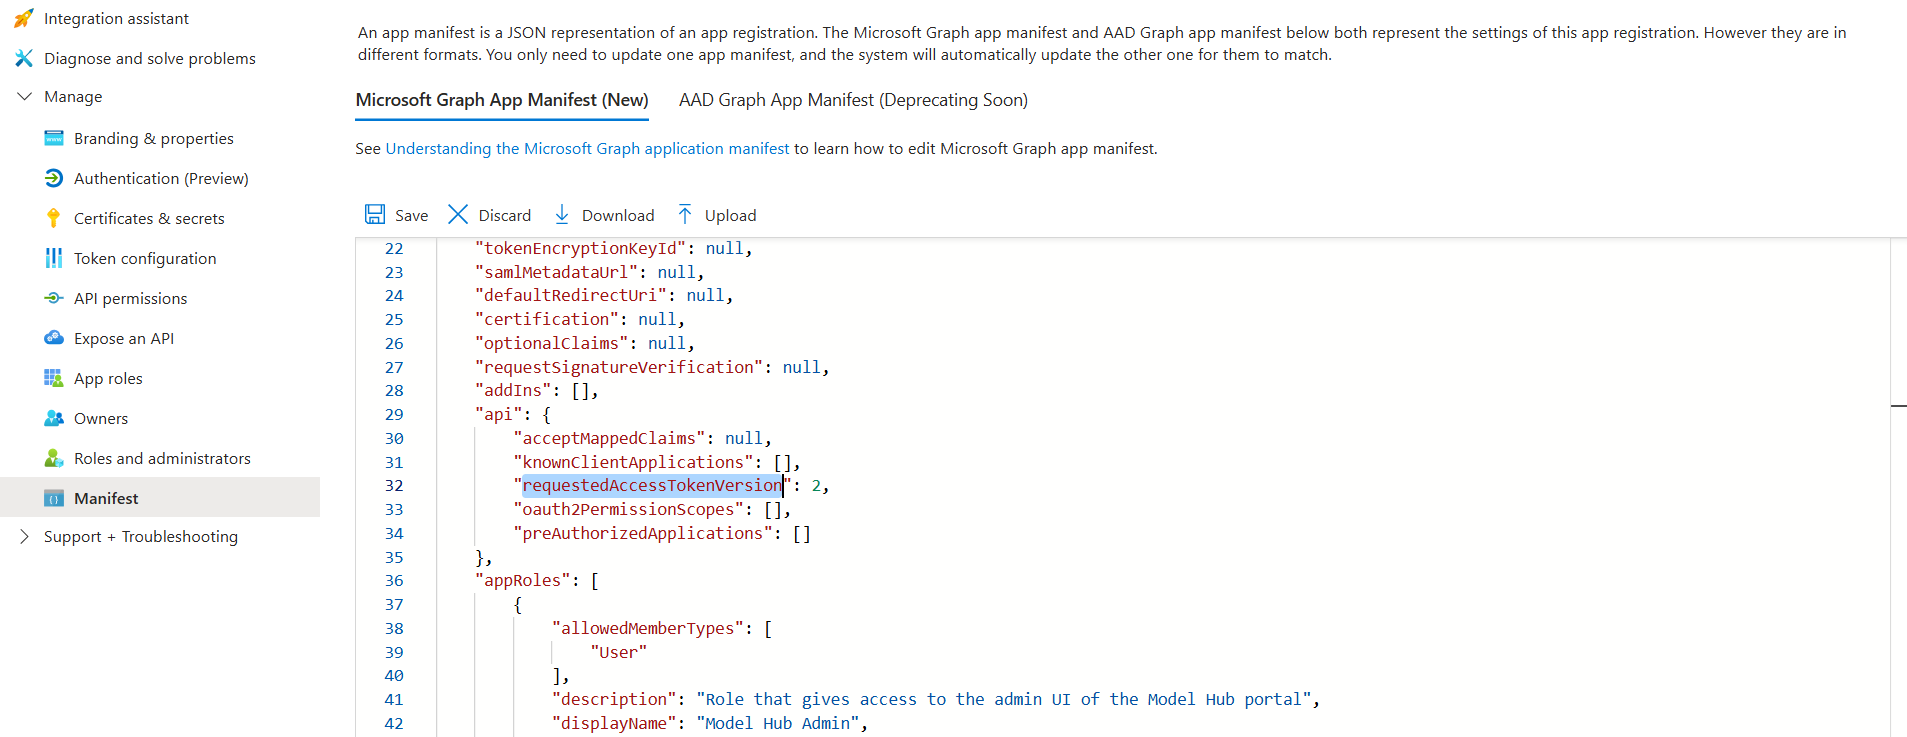
- Click on Manage -> Manifest
- In the text editor, look for requestedAccessTokenVersion and make sure it's set to 2
5. Give users access to the admin UI
In Azure Entra ID, select Enterprise applications, then click on the app you just created
If you want all users in your organization to access Model Hub, then skip this step. If you want only certain users to access Model Hub:
- Go to Manage -> Properties and make sure that "Assignment required?" is set to Yes
- Save
- Then go to Security -> Permissions and click on "Grant admin consent for ...". This operation can only be done by an administrator
To assign users as administrators:
- Select Manage -> Users and groups, then click on + Add user/group
- Select the user you want to add and make sure that Model Hub Admin is selected in "Select a role"
- Click on Assign
If "Assignment required?" is set to No, then every user in your organization will have access to the Model Hub portal, otherwise, to allow users access to the Model Hub portal:
- Select Manage -> Users and groups, then click on + Add user/group
- Select the user you want to add and make sure that Model Hub User is selected in "Select a role"
- Click on Assign
Note: if a user is an admin, there is no need to assign it the role Model Hub User, he will have access to everything
6. Configure the application in the admin portal
Finally, to configure the application to use Entra ID as an authentication server, you will need to go to the admin portal -> Authentication, click on the Authentication enabled toggle, then fill the form with the following
- Identity provider: azure
- Tenant ID and Application (client) ID can be found by going to Azure Entra ID, select Manage -> App registrations, then click on the app you just created and copy the information in the overview